
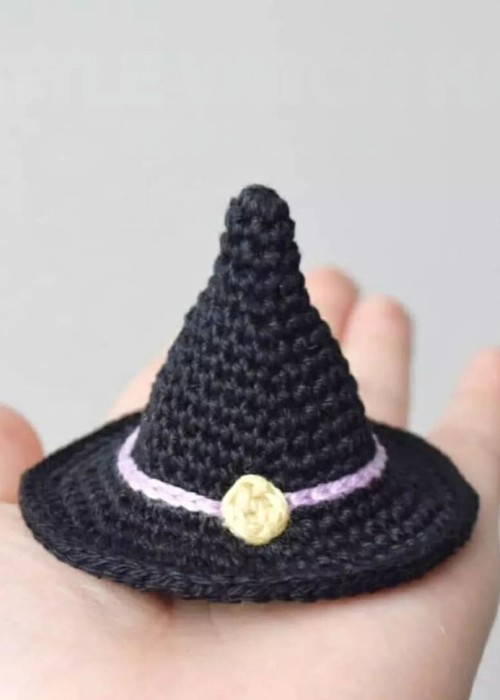
Complement your spooky costume by adding this crochet witch hat following the pattern written in this post. It will be a fun refreshment to your wardrobe, whether it be a baby or an adult. Although this pattern yields a hat in amigurumi size, you can adjust various factors to make it suitable for every age and, thus, head. So, without more delay, gather the supplies needed for this project and get them started!
Designer: @mochastitch On Instagram
Supplies Needed
You will need the following crochet supplies in hand to start this Witch Hat pattern:
- Fine/sport (2) Weight Yarn (you can use cotton, acrylic or their blends as they have nice stitch definition, hold shape well and are easy to work with).
- Size C/2.75mm Crochet Hook
- Scissors
- Yarn Needle
- Stitch Marker
Crochet With Hat Pattern
Are you ready to learn how to crochet the witch hat? Follow through the crochet pattern written below:
Abbreviations
- MR-magic ring
- Rnd - Round
- SC - single crochet
- INC - increase
- DEC - decrease
- (...)*n-repeat in braces n times
Hat
- Rnd 1: 6 sc in magic ring (6)
- Rnd 2: Sc in each st (6)
- Rnd 3: 1 sc, inc *3 (9)
- Rnd 4: Sc in each st (9)
- Rnd 5: 2 sc, inc *3 (12)
- Rnd 6: 3 sc, inc *3 (15)
- Rnd 7: 4 sc, inc *3 (18)
- Rnd 8: inc, 5 sc *3 (21)
- Rnd 9: 6 sc, inc *3 (24)
- Rnd 10: inc, 7 sc *3 (27)
- Rnd 11: 8 sc, inc *3 (30)
- Rnd 12: inc, 9 sc *3 (33)
- Rnd 13: 10 sc, inc *3 (36)
- Rnd 14: Sc in each st (36)
- Rnd 15: inc, 5 sc *6 (42)
- Rnd 16: 6 sc, inc *6 (48)
- Rnd 17: 5 sc, inc *8 (56)
- Rnd 18: inc, 6 sc *8 (64)
-
Sl st in all 64 sts of rnd 18 to strengthen the brim of the hat. Finish off with an invisible finish. Weave in yarn tail
Hat Belt
Sl st in each st between rnd 14 & 15
Connect to the start of the belt with an invisible finish. Weave at the end on the inside of the hat
Hat Buckle
- Create a magic ring with 6 sc
- Close off the ring with an invisible finish
- Leave a tail of yarn to sew the buckle to the hat
- Sew the buckle on after the hat belt has been stitched onto the hat


Leave a Reply