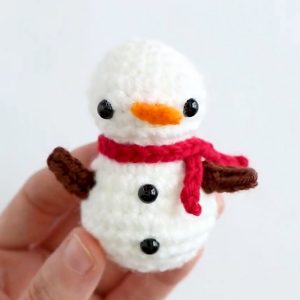
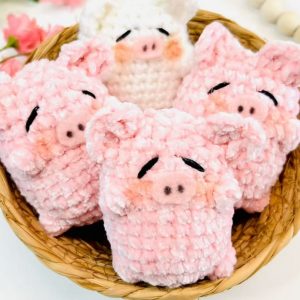
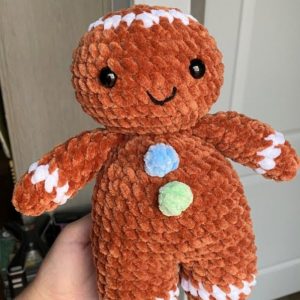
Learn how to crochet a lovable little cow for free! This crochet amigurumi project uses white, bubblegum pink, and black colours to bring our adorable creature to complete! Imagine it now, with its cute ears and playful, spiralled tail. The instructions are straightforward and appealing to both beginners and experienced crocheters. Whether you're looking to add to your crochet menagerie or searching for a heartwarming amigurumi gift, the Crochet Little Cow is your ticket to an enjoyable crafting experience. So, ready your crochet hooks and let's crochet this delightful cow pattern without any cost!

Best Yarn For Crochet Little Cow Amigurumi
When selecting yarn for your Crochet Little Cow project, consider these yarn types for the best results:
Cotton Yarn
- Smooth Finish: Gives your amigurumi a clean look and feel.
- Durable: Maintains shape and detail over time.
Acrylic Yarn
- Wide Color Selection: Offers a variety of vibrant colors.
- Easy Care: Simple to wash, making it great for toys.
Wool Yarn
- Elasticity: Helps the amigurumi retain shape after stuffing.
- Natural Fiber: Adds a cosy feel to your crochet cow.
Blended Yarns
- Versatile Qualities: Combines the best features of other yarns.
- Easy to Work With: Good for both beginners and experienced crafters.
Considerations
- Yarn Weight: Choose a light to medium weight (DK or Worsted) for the right stitch density.
- Safety: If intended for children, prefer non-toxic, hypoallergenic, and washable yarns.
Selecting the right yarn will enhance the appearance, feel, and longevity of your Crochet Little Cow.
Making The Crochet Little Cow
Terms (Us):
- Sc =Single Crochet (X-stitch)
- Hdc = Half Double Crochet
- Sl St = Slip Stitch
- Dc= Double Crochet
- Inc = Increase
- Dec =invisible Decrease
- Ch=chain
- Mr = Magic Ring
- Fo = Fasten Off
Materials:
- Yarn In Any Size In White, Dark Grey, Pink
- Hook In Corresponding Size
- Yarn Needle
- Polyester Fiberfill
- Scissors
Step by step Pattern
Head (Make 1 In White Yarn):
- 1. Sc 6 Into Mr
- 2. Inc X 6 (12)
- 3. (Sc, Inc) X6 (18)
- 4. (2 Sc, Inc) X6 (24)
- 5. (3 Sc, Inc) X6 (30)
- 6.-17. Sc 30 (Sc 30 For 12 Rounds)
- 18. (3 Sc, Dec) X6 (24), Begin Stuffing The Head
- 19. (2 Sc, Dec) X6 (18)
- 20. (Sc, Dec) X6 (12) 21. Dec X 6 (6), Fo
Snout (Make 1 Using Pink Yarn):
- 1. Sc 6 Into Mr
- 2. Incx6 (12)
- 3. (Sc, Inc) X6 (18)
- 4.-13. Sc 18 (Sc 18 For 10 Rounds)
- 14. (2 Sc, Dec) X 6 (18), Stuff Snout
- 15. (Sc, Dec) X6 (12)
- 16. Dec X 6 (6), Fo
Ears (Make 2, One In Grey, One In White):
- 1. Ch 7
- 2. Sc In Second Ch From The Hook, Hdc, Dc, Dc, Hdc, Sl St, Ch 1, Turn 3. Sc 6, Fo
Body (Make 1 Using White Yarn):
- 1. Sc 6 Into Mr
- 2. Incx6 (12)
- 3. (Sc, Inc) X6 (18)
- 4. (2 Sc, Inc) X6 (24)
- 5. (3 Sc, Inc) X6 (30)
- 6. (4 Sc, Inc) X6 (36)
- 7. (5 Sc, Inc) X6 (42)
- 8.-16. Sc 42 (Sc 42 For ↑ Rounds)
- 17. (5 Sc, Dec) X6 (36)
- 18. (4 Sc, Dec) X6 (30), Begin Stuffing The Body
- 19. (3 Sc, Dec) X6 (24)
- 20. (2 Sc, Dec) X6 (18)
- 21. (Sc, Dec) X6 (12)
- 22. Decx 6 (6), Fo
Front legs (make 2):
- 1. Start with grey: sc 6 into mr
- 2. Inc x6 (12)
- 3. Switch to white yarn: sc 12
- 4.-6. Sc 12, fo, leave tail for sewing
- Back legs (make 2):
- 1. Follow steps 1-6 of the front legs but do not fasten off
- 2. Ch 1, turn, sc 6 (6)
- 3. Ch 1, turn, sc 6 (6)
- 4. Ch 1, turn, sc 6 (6), fo
Spots (make 2 in grey):
- 1. Sc 6 into mr
- 2. Inc x6 (12)
- 3. (sc, inc) x6 (18)
- 4. (2 sc, inc) x6 (24)
- 5. (3 sc, inc) x6 (30)
Tail (Make 1):
- Either braid three pieces of white yarn into a tail to make a 3-4 cm long tail or make a basic crochet cord using this technique:
- Make a slip knot on the needle, leaving a long tail. Wrap the working yarn around the index finger and the yarn tail around the thumb. So both sides of the yarn make kind of a v-shape. Hold on to the bottom of the slip
- Knot with your right hand to make sure it stays straight. Loop the yarn tail on your thumb around the needle from front to back so that you have two loops on your hook. Yarn over with the working yarn
- From your index finger and pull the working yarn through both loops on the hook. Repeat until the desired length.
- Fo and fray the yarn ends on the tail
Assembly:
- Sew legs onto the bottom of the body slightly pointing outwards. Use pins to fix legs to the body and try out the best placement before sewing.
- Sew snout to head. Sew one spot to the side of the head and one to the top of the body. Sew ears to head.
- Embroider eyes on the head (or use oval safety eyes) and nose holes on the snout. Attach tail to body.
Designer: Laststitchontheleft On Instagram


Leave a Reply