
The Crochet Grim Reaper Amigurumi Pattern is a creative and unique guide that shows you how to crochet a small, friendly version of the Grim Reaper. This free pattern is great for those who love to craft quirky and cute figures, adding a bit of fun to the Halloween season or any collection.

Crochet Grim Reaper Amigurumi Pattern
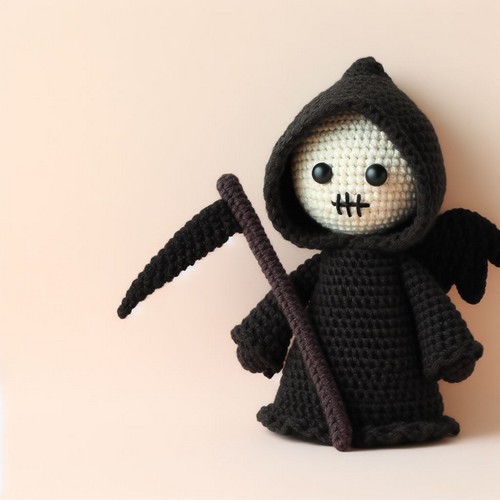
The Crochet Grim Reaper Amigurumi Pattern brings a spooky flair to crochet projects. It follows a monochrome color palette, featuring a hooded figure with a long cloak and a humorous touch of protruding eyes. The pattern is crafted using basic crochet stitches, making it manageable even for beginners. This grim reaper amigurumi is ideal for Halloween decorations or playful presents with a quirky spin.

Making Your Grim Reaper Amigurumi
Materials:
- Worsted weight yarn in black, white, and gray (small amount)
- Crochet hook size H-8 (5.00mm) or size suitable for your yarn weight
- Fiberfill for stuffing
- Tapestry needle
- Scissors
- Stitch marker (optional)
Step by step Pattern
1. Body:
- Start with the black yarn and make a magic ring.
- Chain 2, then crochet 6 single crochets (sc) in the magic ring. Pull tight to close the ring.
- Round 2: (inc) (12 sc)*
- Round 3: (inc) (18 sc)*
- Round 4: (inc) (24 sc)*
- Rounds 5-9: Crochet 1 sc in each stitch around (24 sc)
- Stuff the body firmly with fiberfill.
- Rounds 10-14: (dec) (18 sc, 12 sc)*
- Rounds 15-17: Crochet 1 sc in each stitch around (12 sc)
- Fasten off and weave in the yarn end.
2. Head:
- With black yarn, make a magic ring.
- Chain 2, then crochet 6 sc in the magic ring. Pull tight to close the ring.
- Round 2: (inc) (12 sc)*
- Round 3: (inc) (18 sc)*
- Rounds 4-6: Crochet 1 sc in each stitch around (18 sc)
- Stuff the head firmly with fiberfill.
- Rounds 7-8: (dec) (12 sc)*
- Round 9: Crochet 1 sc in each stitch around (12 sc)
- Fasten off and weave in the yarn end.
3. Robe:
- With black yarn, chain 30 or a number of stitches to reach the desired width of the robe.
- Sc in each stitch across.
- Continue crocheting rows of sc until the robe reaches the desired length, covering the body and most of the legs. You can try the robe on the amigurumi to determine the right length.
- Fasten off and weave in the yarn end.
4. Hood:
- With black yarn, chain 15 or a number of stitches to reach the desired width of the hood opening.
- Sc in each stitch across.
- Continue crocheting rows of sc, increasing 1 stitch at each end of each row until you have a desired hood depth.
- Fasten off and weave in the yarn end.
- Sew the sides of the hood together to create a cone shape.
5. Scythe:
- The handle of the scythe can be crocheted using the same method as the legs (see step 6 below). Use gray yarn for the handle.
- The blade of the scythe can be cut from felt or cardboard and painted black. You can also crochet a flat blade using black yarn, but this may be more challenging for beginners.
6. Legs (make 2):
- With black yarn, chain 10 or until desired leg length.
- Sc in each stitch along the chain. Fasten off and weave in the yarn end.
7. Eyes:
- You can embroider small white circles onto the head for the eyes, with black pupils, or sew on safety eyes.
8. Assembly:
- Sew the head onto the body.
- Sew the robe onto the body, draping it over the legs.
- Sew the hood onto the head, positioning it so that it frames the face.
- Attach the scythe to the hand of the grim reaper using a small amount of yarn or sewing thread.
- Sew the legs onto the bottom of the robe, positioning them evenly spaced.
Finishing Touches:
- You can embroider a small smile or frown on the face of the grim reaper using white yarn (optional).


Leave a Reply