
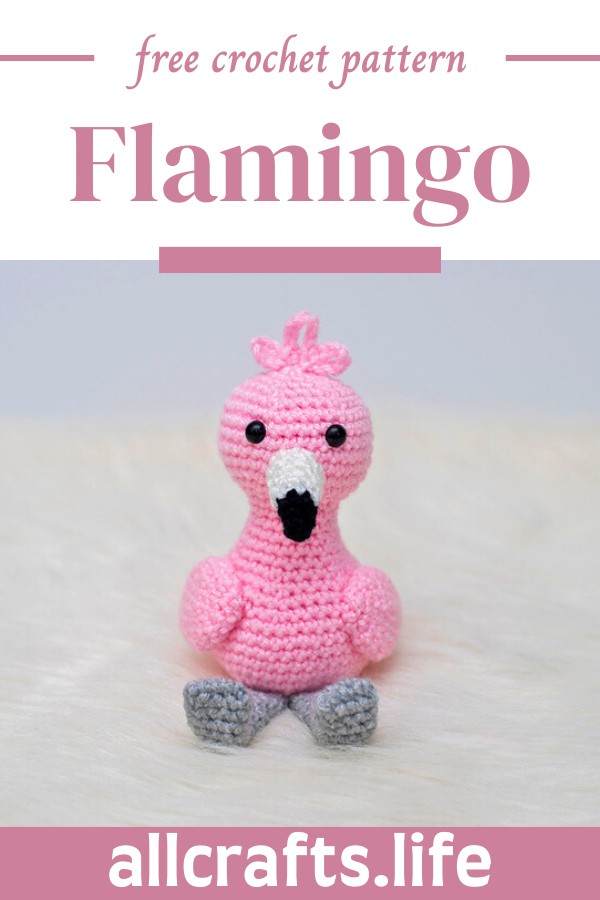
Flora the Flamingo crochet pattern brings a splash of fun into any room with its delightful pink hue and charming design. Ideal for both seasoned crocheters and those just starting their journey in amigurumi, this crochet amigurumi toy pattern creates a playful companion that sparks joy. Whether perched on a shelf or cuddled in the arms of a loved one, Flora adds a touch of whimsy and warmth. With easy-to-follow steps and the possibility to customize colours, it’s perfect for gifting or adding a personalized touch to your decor. Craft your own Flora and let this adorable flamingo sprinkle a bit of magic into your daily life.
Crochet Amigurumi Flamingo
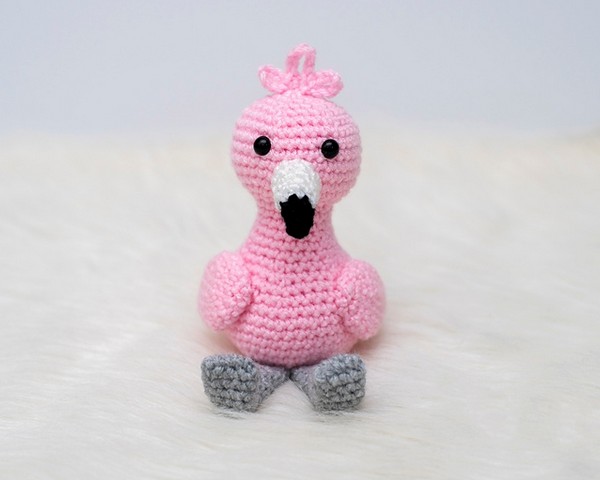
Crochet Amigurumi Flamingo
Materials Required:
- Yarn Weight: Medium (4) Worsted Weight
- Yarn Used: WeCrochet/Knit Picks Brava Worsted
- Yardage:
- Color A (pink): 66 yds
- Color B (black): 3 yds
- Color C (white): 5 yds
- Color D (gray): 14 yds
- Hook Size: 4.0mm (G) crochet hook
- Other Tools:
- Tapestry needle
- Stitch markers
- Scissors (find these on Amazon)
- Other Materials:
- Poly-fil stuffing
- 9mm safety eyes
Stitch Abbreviations:
- st: stitch
- sl st: slip stitch
- ch: chain
- SC: single crochet
- SC2tog: single crochet 2 stitches together (invisible decrease is recommended)
Special Stitches:
- SC2tog (using invisible decrease method): Insert hook into front loop of the first stitch. Insert the hook into the front loop of the second stitch. Yarn over. Draw through the first two loops on the hook. Yarn over. Draw through both loops on hook.
Additional Information:
Gauge: Not necessary for this pattern; see notes.

Leave a Reply