
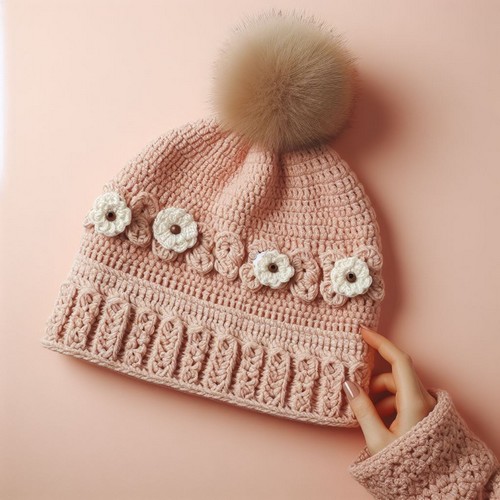
The Crochet Beanie Free Pattern is a straightforward guide for craft enthusiasts. It presents step-by-step instructions, enabling beginners to easily create their own stylish and warm headwear. This free pattern lets you showcase your skills and enjoy a homemade beanie that perfectly fits your style.

Crochet Beanie Free Pattern
The Crochet Beanie Free Pattern guides you to create a cozy, stylish hat using yarn and a crochet hook. This crochet pattern offers step-by-step instructions to craft a soft, stretchy beanie that fits snugly on your head. Perfect for beginners or seasoned crocheters, it's a fun project that lets you customize color and size. The end-product is a warm, handmade beanie ideal for chilly days or thoughtful gifts.
Making Your Crochet Beanie
Materials:
- Worsted weight yarn in red, pink, green, and black
- Size H-8 (5.00 mm) crochet hook
- Yarn needle
- Scissors
- Tapestry needle
- Stitch marker (optional)
Step by step Pattern
Gauge:
12 stitches and 15 rows in double crochet equal 4 inches
Finished Size:
To fit an adult head with a circumference of 20-22 inches
Instructions:
Hat:
- With red yarn, chain 40 stitches.
- Slip stitch into the first chain to form a ring.
- Crochet 12 double crochets into the ring.
- Place a stitch marker in the first stitch of the round.
- Continue crocheting double crochets around, increasing 1 stitch at the end of each round.
- Crochet rounds 2-13, increasing 1 stitch at the end of each round. There should be 108 stitches in round 13.
- Crochet rounds 14-20 without increasing.
- Crochet rounds 21-25, decreasing 1 stitch at the end of each round. There should be 72 stitches in round 25.
- Crochet rounds 26-29, decreasing 2 stitches at the end of each round. There should be 54 stitches in round 29.
- Crochet rounds 30-32, decreasing 3 stitches at the end of each round. There should be 36 stitches in round 32.
- Stuff the top of the hat with fiberfill.
- Crochet rounds 33-35, decreasing 4 stitches at the end of each round. There should be 18 stitches in round 35.
- Cut the yarn, leaving a long tail for sewing.
- Thread the tail onto a yarn needle and weave it through the remaining stitches to close the top of the hat.
Strawberry:
- With pink yarn, chain 6 stitches.
- Slip stitch into the first chain to form a ring.
- Crochet 12 single crochets into the ring.
- Change to red yarn.
- Crochet 1 round of single crochets around, increasing 1 stitch at the end of each round. There should be 13 stitches in total.
- Stuff the strawberry with fiberfill.
- Crochet another round of single crochets around, decreasing 1 stitch at the end of each round. There should be 12 stitches in total.
- Cut the yarn, leaving a long tail for sewing.
- Thread the tail onto a yarn needle and weave it through the remaining stitches to close the bottom of the strawberry.
Leaves:
- With green yarn, chain 8 stitches.
- Single crochet in the second stitch from the hook, then single crochet in each of the remaining stitches.
- Chain 2, turn.
- Single crochet in each of the stitches across.
- Chain 2, turn.
- Single crochet in each of the stitches across, decreasing 1 stitch at each end.
- Chain 2, turn.
- Single crochet in each of the stitches across, decreasing 1 stitch at each end.
- Cut the yarn, leaving a long tail for sewing.
- Thread the tail onto a yarn needle and sew the leaf to the side of the strawberry.
- Make another leaf in the same way and sew it to the other side of the strawberry.
Stem:
- With black yarn, chain 5 stitches.
- Single crochet in the second stitch from the hook, then single crochet in each of the remaining stitches.
- Chain 10 stitches.
- Cut the yarn, leaving a long tail for sewing.
- Thread the tail onto a yarn needle and sew the stem to the top of the strawberry.
Assembly:
- Sew the strawberry to the top of the hat.
Tips:
- You can adjust the size of the hat by crocheting more or fewer rounds.
- You can make the strawberry bigger or smaller by using more or fewer stitches.
- You can add other embellishments to the hat, such as buttons or beads.


Leave a Reply