
The Crochet Table Runner Free Pattern is an easy-to-follow guide to creating a handmade touch for your dining room. Great for beginners and experts alike, this pattern transforms simple stitches into an elegant table accessory, adding a uniquely crafted charm to any meal or gathering.
Crochet Table Runner Free Pattern
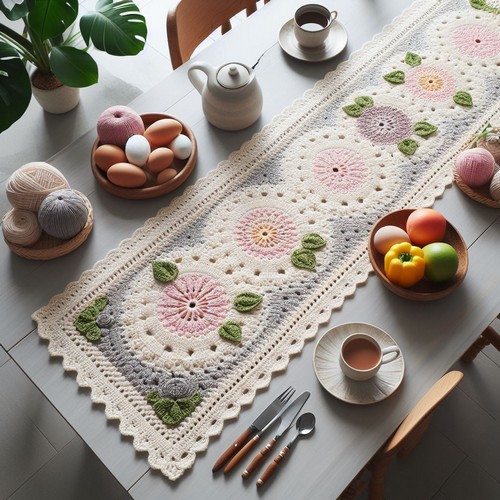
The Crochet Table Runner Free Pattern offers an elegant and intricate design to adorn any dining or coffee table. Crocheted with delicate stitches and available in a range of styles, from vintage lace to modern geometric patterns, this pattern creates a beautiful, elongated piece that enhances home decor. Ideal for both special occasions and everyday use, the pattern is straightforward, making it suitable for crocheters with basic to intermediate skills, eager to add a handmade touch to their home.
Making Your Crochet Table Runner Pattern
Materials:
- Worsted weight yarn in your desired color(s) (amount depending on the desired size of the runner)
- Crochet hook size H-8 (5 mm) or size appropriate for your yarn weight
- Tapestry needle
- Scissors
Gauge:
- It's not essential to make a gauge swatch for this project, but if you prefer one, you can make a small granny square and measure it to ensure you're happy with the stitch size.
Step by step Pattern
1. Chain foundation:
- Chain a number of stitches corresponding to the desired width of your table runner. A good starting point is 30-40 stitches, but you can adjust this based on your preference.
2. Granny stitch squares:
- Work granny stitch squares across the foundation chain. There are many ways to crochet granny squares, but here's a basic method:
- Double crochet 3 stitches into the second chain from the hook.
- Chain 2, turn your work.
- Double crochet 3 stitches into the first cluster (space between the chain-2 spaces), chain 2.
- Repeat step 3, crocheting 3 double crochets into each cluster and chaining 2 between each cluster until you have a total of 5 clusters across the row.
- Join with a slip stitch to the top of the first double crochet.
- Chain 3 (counts as the first double crochet of the next round), turn your work.
- Work 2 double crochets into the same space as the joining slip stitch, chain 2.
- Continue crocheting clusters of 3 double crochets separated by chain-2 spaces around the previous round, incorporating corner increases to maintain a square shape.
- You can find tutorials online for granny square variations and corner increase methods.
3. Size and shaping:
- Continue working granny stitch squares until you reach the desired length for your table runner. You can try laying the squares flat to estimate the overall size as you go.
4. Joining squares (optional):
- If you want your runner to be a single piece instead of separate squares, you can join them together as you crochet the last round around the perimeter. Here are two methods:
- Slip stitch method: Slip through the corresponding sides of adjoining squares as you work the last round.
- Crocheted join method: Different crocheted join methods are available online, such as the "invisible join" or the "crab stitch join." Choose one and follow the instructions to join the squares together seamlessly.
5. Edging (optional):
- Once the table runner's main body is finished, you can add a row or two of edging around the perimeter for a neater look. You can use simple stitches like single crochet or double crochet or experiment with other decorative edgings like picots or shells.
6. Finishing touches:
- Weave in any loose ends.
- You can block the table runner by gently pinning it out to its desired shape and letting it dry flat. This will help it lay flat and even.
Tips:
- You can customize this pattern by using different colors, yarn weights, or stitch patterns.
- You can adjust the size of the table runner by using more or fewer granny stitch squares.
- If you are a beginner crocheter, many online resources are available with tutorials for granny squares and basic crochet stitches.
- Don't be afraid to experiment and have fun with your design!


Leave a Reply