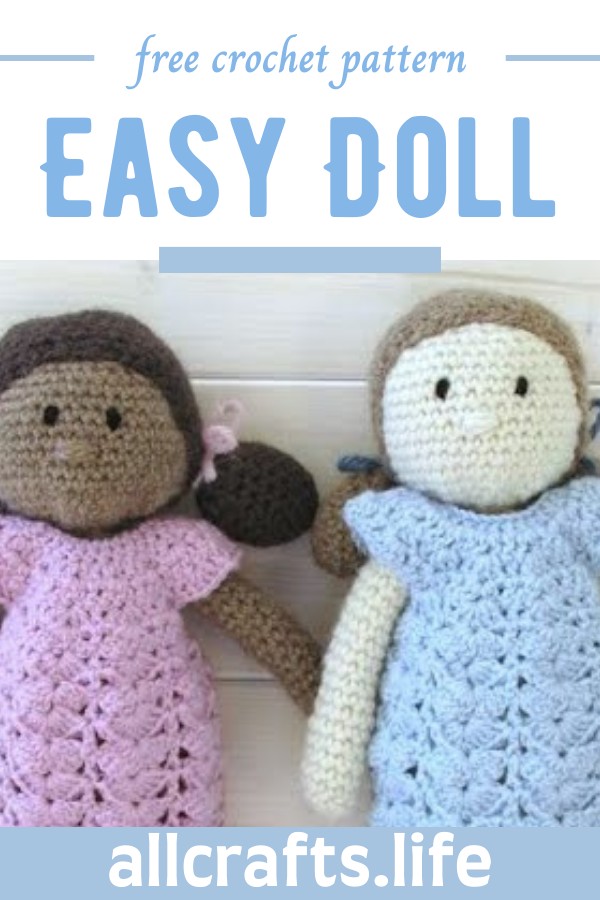
Following this crochet doll tutorial will be a delight, the instructions are clear, guiding even beginners through each step with ease. Watching the creation of these adorable dolls come to life was truly inspiring. It’s a fantastic resource for anyone wanting to dive into the world of crochet and make something special. This tutorial shines brightly as a beacon for craft enthusiasts.
How To Crochet An Easy Doll

Materials Needed:
- DK weight yarn
- 4mm crochet hook
- Polyester toy stuffing
- Yarn needle
Pattern:
Shoe & Leg:
Creating the Shoe:
- Start with a slipknot and chain 6.
- Round 1: Work 2 single crochets into the second chain from the hook. Continue with 1 single crochet in each of the next 3 chains, then perform 4 single crochets in the last chain. Working on the opposite side of the chain, do 1 single crochet into each of the next 3 chains, and finish the round with 2 single crochets in the last chain. Join with a slip stitch. (14 stitches)
- Round 2: Chain 1 (does not count as a stitch). Start each of the next 2 stitches with 2 single crochets, then 1 single crochet in the next 3 stitches. Perform 2 single crochets in each of the next 4 stitches, followed by 1 single crochet in the next 3 stitches. Complete the round with 2 single crochets in each of the last 2 stitches. Join with a slip stitch. (22 stitches)
- Continue increasing in a similar manner until the toe section of the shoe is formed.
Working up the Leg:
- Once the shoe is complete, continue with rounds of single crochets (without increases). Work in spirals using a stitch marker to denote the round's beginning and perform standard single crochet rounds to lengthen the leg.
- After several rounds, stuff the shoe firmly with polyester stuffing.
Body:
After completing the legs, join them together:
- Place the right sides of the legs together, chain 1, and then evenly distribute single crochets around one leg.
- Chain a few and connect the other leg by continuing with single crochets.
- Work in continuous rounds, adding rounds of single crochets to build the torso.
- Decrease rounds at the upper body to form shoulders.
Head:
Formation of the Head:
- Work rounds, increasing the number of stitches to broaden the head.
- After achieving the desired width, continue with several rounds without increases to shape the head.
- Start decreasing for the top of the head, complete the decreases and then close the head.
Arms:
- Start each arm with a magic ring and single crochets inside the ring.
- Gradually increase in the first few rounds, then switch to continuous rounds of single crochets to lengthen the arm.
- Finish with stuffing and then sew the arms to the body at shoulder height.

Finishing Touches:
- Sew all parts together, secure all loose ends.
- Add facial features using black yarn for eyes and a simple yarn smile.
Dress (Optional):
Crochet a separate dress or outfit as per your color and design preferences.
This pattern creates a basic doll form which you can customize with different colors, accessories, or clothing. Following this pattern step-by-step along with appropriate video sections will help you complete your doll.


Leave a Reply