
Make a fun buddy with our Crochet Wasp Amigurumi Pattern. The guide includes comprehensive steps for creating a vibrant, lovable wasp. Perfect for gifting, decoration, or for hobbyist crafters.
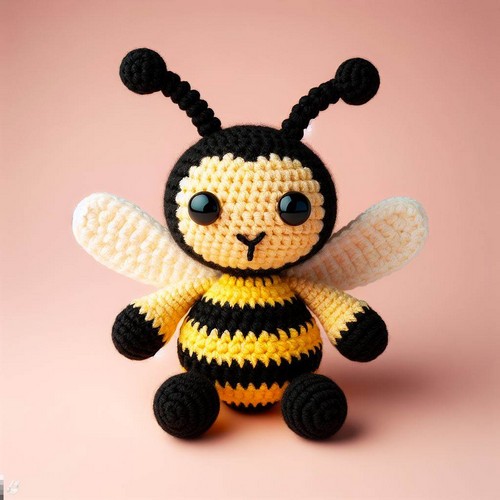
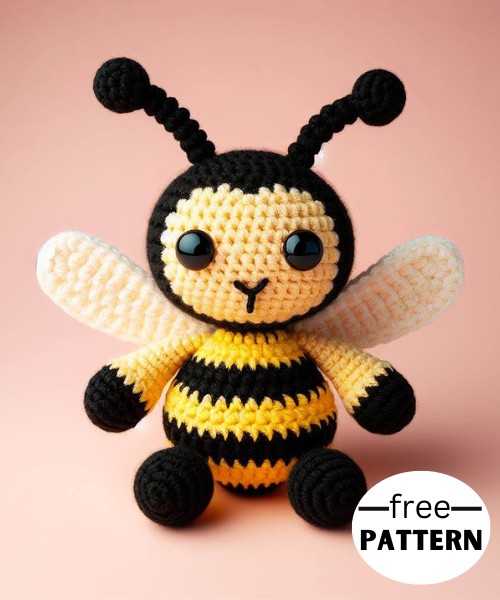
The Crochet Wasp Amigurumi Pattern is a delightful and creative crochet project. This pattern intricately fashions a charming wasp-shaped plush using simple crochet techniques, vivid shades of yellow and black yarn, and soft stuffing. Its anatomical design includes distinct wings, slender antennae, and a stripy body, capturing a wasp's quintessential attributes while adding a charming touch.
Step By Step Guide
Materials
- Yarn in yellow, black, and white
- 2.25mm crochet hook
- Black safety eyes (6mm)
- Embroidery needle and thread
- Fiberfill stuffing
- Stitch marker (optional)
The body
- Start with yellow yarn and make a magic ring.
- Crochet 6 single crochets (sc) into the ring and pull tight.
- Place a stitch marker and crochet 12 sc around, increasing into each stitch. Do not place a marker in the last stitch.
- Continue crocheting in rounds of SC, increasing 6 stitches evenly in each round until you have 36 stitches.
- Once you have 36 stitches, continue crocheting in rounds of SC without increasing for 8 rounds.
- Stuff the body firmly with fiberfill.
- Crochet one more round of SC and then slip stitch to close. Weave in the ends.
The head
- With black yarn, make a magic ring and crochet 6 sc into the ring. Pull tight.
- Crochet 12 sc around, increasing into each stitch. Do not place a marker in the last stitch.
- Continue crocheting in rounds of SC, increasing 6 stitches evenly in each round until you have 36 stitches.
- Crochet 4 rounds of SC without increasing.
- Stuff the head firmly with fiberfill.
- Crochet one more round of SC and then slip stitch to close. Weave in the ends.
The wings (make 2)
- With white yarn, chain 12.
- Turn and sc in the second chain from the hook and across each chain.
- Chain 2, turn, and sc in each stitch across.
- Repeat rows 2 and 3 for a total of 10 rows.
- Slip stitch to close and weave in the ends.
Assembly
- Sew the black head onto the yellow body, centering the stitches.
- Sew the white wings onto the back of the body, positioning them so they are evenly spaced.
- Glue or sew on the black safety eyes.
- With black embroidery thread, stitch a small stinger onto the front of the head.
Your crocheted wasp amigurumi is complete!


Leave a Reply