
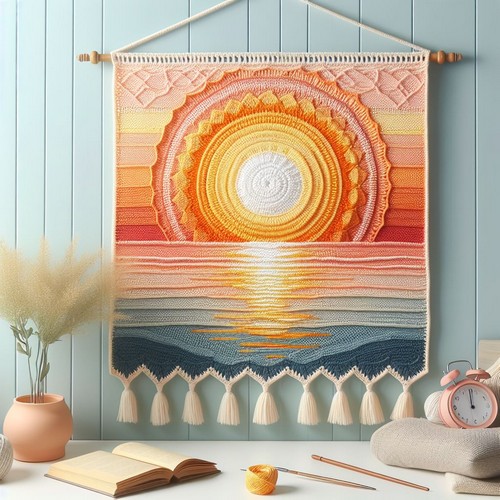
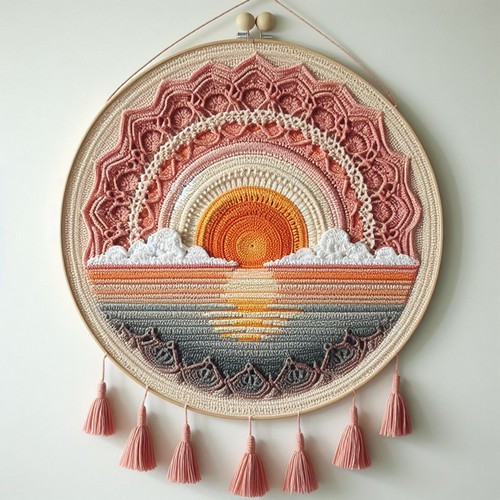
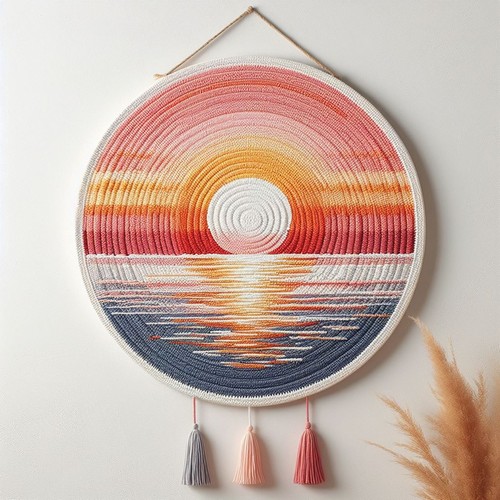
The Crochet Sunset Wall Hanging Pattern is a delightful guide to making a captivating piece of wall art. Simple to follow, this free guide enables you to transform yarn into a vibrant sunset. It illuminates your decor while making your crafting journey an enjoyable one.
Crochet Sunset Wall Hanging Free Pattern
The Crochet Sunset Wall Hanging Pattern captures the breathtaking beauty of a sunset in yarn, blending vibrant colors into a visually stunning piece of home decor. This easy crochet pattern creates a textured landscape of the setting sun over a tranquil scene, perfect for adding color and warmth to any room. Easy to follow, it's designed for those with basic crochet skills, making it an enjoyable project for creating a bespoke and eye-catching wall feature.
Making Your Crochet Sunset Wall Hanging
Materials:
- Worsted weight yarn in various colors for the sunset (orange, yellow, pink, purple, etc.)
- Crochet hook size H-8 (5 mm) or size appropriate for your yarn weight
- Tapestry needle
- Scissors
- Optional: Dowel rod for hanging
Step by step Pattern
1. Chain foundation row:
- Choose your starting color and chain a desired number of stitches for the width of your wall hanging. A good starting point is 50-70 stitches, but you can adjust based on your preference.
2. Work in rows:
- From the bottom (foundation row), crochet rows using single crochet stitches (sc) and changing colors to create the sunset gradient. You can aim for a smooth transition by alternating colors within rows or changing colors at the end of each row.
- Work several rows in each color before switching for a more defined blocky look.
3. Create the wave pattern (optional):
- You can incorporate increases and decreases within the rows to add a wave-like pattern to the bottom edge. For example, increase one stitch at regular intervals (e.g., every 5-10 stitches) and then decrease one stitch a few rows later in the corresponding spots.
- You can adjust the frequency and placement of these increases and decreases to achieve the desired wave effect.
4. Continue working rows and changing colors:
- As you work upwards, gradually transition your colors to represent the different layers of the sunset (orange, yellow, pink, purple, etc.). Aim for a natural-looking blend of colors.
5. Finishing touches:
- Once you reach your desired height, finish off the last row by crocheting a slip stitch in each remaining stitch.
- Weave in any loose ends.
6. Hanging your wall hanging:
- You can add a dowel rod or other hanging mechanism to the top of your wall hanging. Sew or crochet loops onto the back of the wall hanging to thread the dowel rod through.
- Alternatively, you can simply hang the wall using nails or adhesive hooks.
Tips:
- Use a variety of stitch textures to add visual interest to your wall hanging. For example, you could incorporate rows of double crochet stitches (dc) or even more textured stitches like popcorn or bobble.
- Don't be afraid to experiment with color combinations and wave patterns to create a unique and personalized sunset wall hanging.
- You can adjust the wall hanging size by using more or fewer stitches in the foundation row and working more or fewer rows.


Leave a Reply