
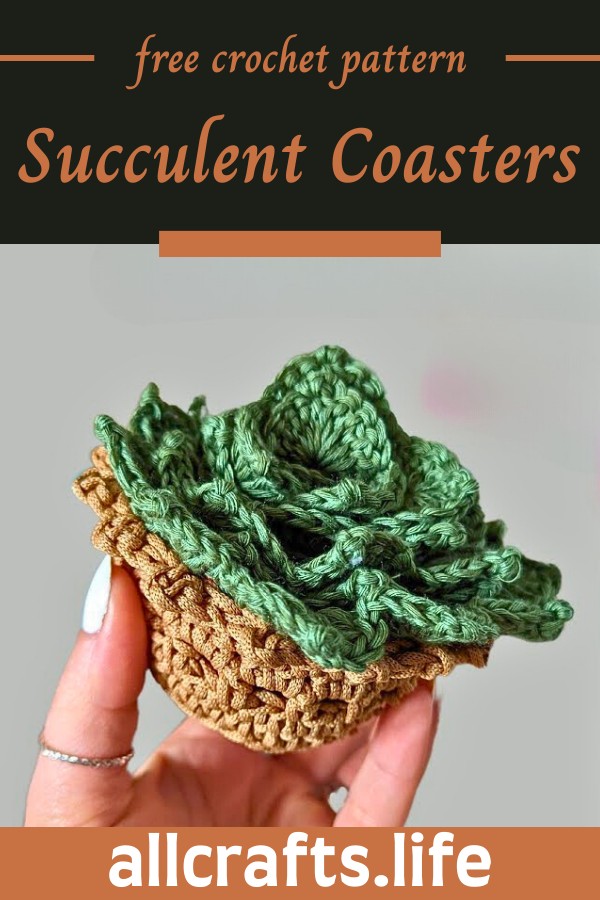
Add a touch of natural charm to your space with our Crochet Succulent Coasters and Pot. These unique coasters are crafted to resemble delightful little succulents, bringing a cozy, earthy vibe to any room. Each set includes a cute pot to store your coasters, mimicking a real succulent pot. It's a perfect way to keep things tidy and add a splash of greenery, without the need for watering! Whether you're enjoying a warm cup of tea or a cold drink, these crochet accessories are sure to enhance your relaxing moments at home.

This delightful crochet project transforms simple stitches into a picturesque set that mimics a succulent’s unique look, complete with a teapot coaster for tea lovers. The design is straightforward, making it appealing for both beginners and seasoned crafters. Ideal for adding a touch of nature-inspired beauty to any table setting, this crochet pattern not only decorates your space but also serves as a practical item for daily use. Perfect as a gift or a personal home decor upgrade!
Making The Succulent Coasters And Pot
Materials
- Green Yarn (for the succulent leaves)
- Brown or Terra Cotta Yarn (for the soil or pot)
- Crochet hook suitable for your yarn (suggestion: 3.5mm for the coaster, 5mm for the pot)
- Yarn needle
- Scissors
Abbreviations
- ch = chain
- sl st = slip stitch
- sc = single crochet
- dc = double crochet
- inc = increase (two stitches in the same space)
- dec = decrease (combine two stitches into one)
- [] = repeat instructions within brackets
Succulent Coaster Pattern
Creating the Soil/Base
- Start (Soil Section):
- With brown yarn, make a magic circle.
- Round 1: Ch 2 (counts as your first dc here and throughout), then 11 dc into the circle. Sl st to join.
- Round 2: Ch 2, dc inc in each stitch around. Join with sl st.
- Continue increasing in this manner for 1-2 more rounds, as needed for size.
Succulent Part
- Switch to Green Yarn:
- With green yarn, attach to any dc on the round.
- Leaf Formation: Ch 1 (counts as your first sc), [dc, ch 2, sl st in the 2nd chain from hook (picot made), dc, sc] in the same stitch. Skip 2 stitches, and repeat brackets around for leaf formation. Adjust to ensure you end symmetrically.
- Next Rounds:
- Adjust the leaf sizes as you like by adding more dc or using treble crochet (tr) for larger leaves. Work in a spiral, adding more rows of leaves and increasing their size gradually to mimic a succulent's growth pattern.
- Final Touches:
- After achieving the desired size, fasten off and weave in ends for a neat finish.
Notes:
- For a varied look, consider changing the leaf shape by adjusting the number of chains in your picots or incorporating different stitch heights (e.g., sc, hdc, dc, tr).
- The size and thickness of your coaster can be adjusted by changing your hook size or yarn weight.
Below is a basic guide on how to crochet a pot pattern for your succulent coasters. This will create a simple, round pot that can be adjusted in size according to your needs.
Pot Pattern:
Materials
- Terra Cotta or Brown Yarn (or any colour you prefer for the pot)
- Crochet hook (Use a larger hook like 5mm if you want a looser, larger pot)
- Scissors
- Yarn needle
Step-by-step Instructions
- Starting the Base:
- With your chosen yarn, make a magic circle.
- Round 1: Ch 2 (does not count as a stitch), 12 dc into the circle. Join with sl st to the first dc (12 dc).
- Round 2: Ch 2, 2 dc in each stitch around. Join with sl st (24 dc).
- Round 3: Ch 2, dc in the next stitch, 2 dc in the next stitch; repeat from * to * around. Join with sl st (36 dc).
- Continue with similar increases for 1 or 2 more rounds if a larger base is needed.
- Building the Sides:
- Round 4: Ch 2, dc in each stitch around in the back loops only to create a defining line for the base of the pot. Join with sl st.
- Round 5: Ch 2, dc in each stitch around. Join with sl st.
- Repeat this round until you achieve the desired height for the pot. Generally, 3-4 more rounds are sufficient.
- Creating the Rim:
- Final Round: To create a pronounced rim, you can either:
- Option 1: Sc in each stitch, increasing every 3-5 stitches.
- Option 2: Work hdc or dc in front loops only to create a lifted, decorative edge.
- Join with a sl st and fasten off. Weave in the ends for a clean finish.
- Final Round: To create a pronounced rim, you can either:
Optional Adjustments:
- Texturing: Add surface slip stitches in spiral or vertical lines for a textured clay pot effect.
- Colour Work: Use different colours or variegated yarn to mimic decorative pots.
- Handles: For a more detailed pot, you could add small loops or handles on either side at the top round.


Leave a Reply