
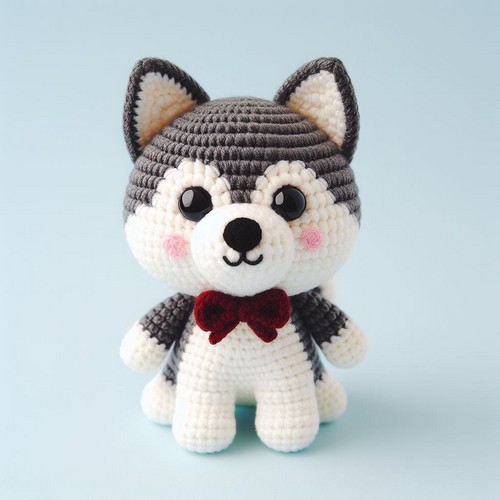
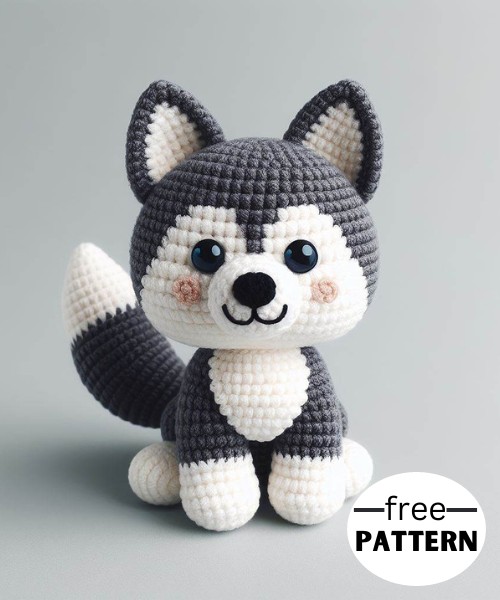
Create a cute, lovable Crochet Husky Dog Amigurumi with this detailed pattern. Ideal for intermediate skill levels, it's a beautiful project resulting in a soft, adorable toy or home decor piece.

The Crochet Husky Dog Amigurumi Pattern is unique and adorable for crafting a fuzzy mini companion. Consisting of simple stitches and techniques, anyone with basic crochet knowledge can create it. Once completed, it manifests as a huggable, round-shaped husky dog with captivating, button-like eyes and a well-defined snout. The precision in design gives it a lifelike charm that makes it a lovely gift or decor item.
Step By Step Guide
Materials:
- Worsted weight yarn in white, black, and grey
- 4.0 mm crochet hook
- Black safety eyes
- Embroidery needle
- Stuffing
- Scissors
- Stitch marker (optional)
Body
- Make a magic ring with the white yarn.
- Crochet 6 single crochets (sc) into the ring. Tighten the ring.
- Increase one sc in each sc around. You should now have 12 sc.
- Continue crocheting in rounds, increasing one stitch in each stitch until 30 stitches.
- When you have 30 sc, stop increasing.
- Continue crocheting in rounds, crocheting one sc in each sc around for 22 rounds. You should have a total of 52 rounds.
- Stuff the body firmly with stuffing.
- Crochet 2 more rounds without increasing.
- Fasten off and weave in the ends.
Head
- Make a magic ring with the white yarn.
- Crochet 6 sc into the ring. Tighten the ring.
- Increase one sc in each sc around. You should now have 12 sc.
- Continue crocheting in rounds, increasing one stitch in each until you have 20 stitches.
- Crochet 7 rounds without increasing.
- Stuff the head firmly with stuffing.
- Crochet 3 rounds without increasing.
- Decrease one sc in each sc around. You should now have 18 sc.
- Decrease one sc in each sc around. You should now have 12 sc.
- Stuff the head with a little more stuffing.
- Decrease one sc in each sc around. You should now have six sc.
- Fasten off and weave in the ends.
Legs (make 4)
- Make a magic ring with the white yarn.
- Crochet 6 sc into the ring. Tighten the ring.
- Increase one sc in each sc around. You should now have 12 sc.
- Crochet 12 rounds without increasing.
- Stuff the leg with stuffing.
- Crochet 2 rounds without increasing.
- Fasten off and weave in the ends.
Tail
- Make a magic ring with the white yarn.
- Crochet 6 sc into the ring. Tighten the ring.
- Increase one sc in each sc around. You should now have 12 sc.
- Crochet 18 rounds without increasing.
- Stuff the tail with stuffing.
- Crochet 2 rounds without increasing.
- Fasten off and weave in the ends.
Ears (make 2)
- Make a magic ring with the white yarn.
- Crochet 4 sc into the ring. Tighten the ring.
- Increase one sc in each sc around. You should now have eight sc.
- Crochet 8 rounds without increasing.
- Shape the ear by crocheting three sc, decreasing one sc, crocheting two sc, decreasing one sc, crocheting one sc.
- Continue crocheting around, decreasing one sc at the end of each round until you have three sc.
- Fasten off and weave in the ends.
Assembly
- Sew the head to the body.
- Sew the legs to the body.
- Sew the tail to the body.
- Sew the ears to the head.
- Attach the safety eyes to the head.
- Embroider the nose and mouth with black embroidery floss.
Optional: Add a bowtie or other embellishments.
Now you have your very own crocheted amigurumi husky dog!


Leave a Reply