
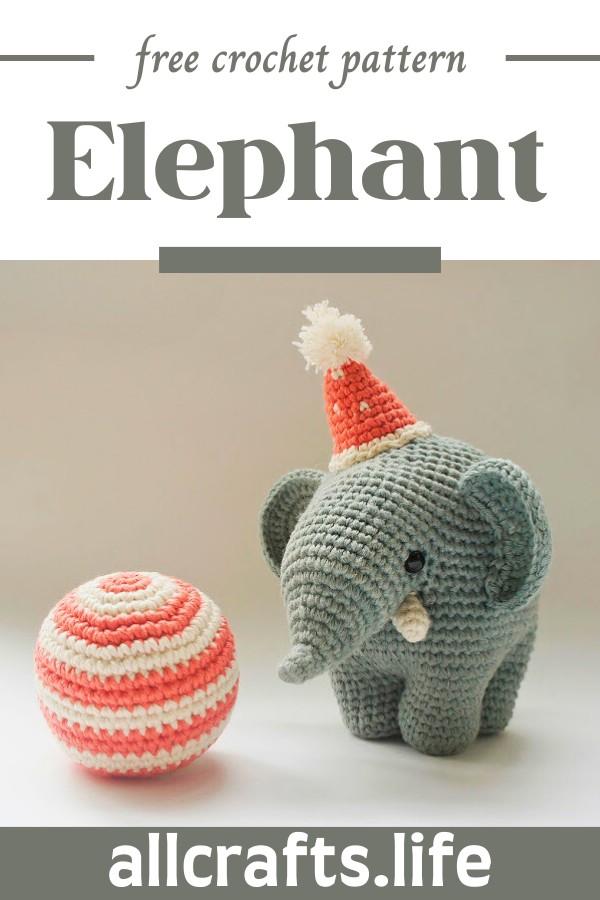
Delightfully charming this Crochet Gustav The Balancing Elephant Amigurumi is an adorable example of crochet craftsmanship. With intricate patterns and a playful design, this pattern makes creating a cherished keepsake seem like a playful adventure. Perfectly detailed instructions guide you through each stitch, ensuring a fun experience and a delightful final product.
Crochet Gustav The Balancing Elephant Amigurumi

Ideal for gifting or adding a touch of whimsy to any room, Gustav is sure to win hearts and balance joyously in the world of handmade crafts.
Materials
- 3.00 mm crochet hook
- 100% cotton yarn for a 3.00 mm hook
- Tapestry needle
- A pair of safety eyes
- Polyfiber fill
Colors
- Main color for the body
- White for the tusks
- A main and a contrasting color for the hat and the ball
Abbreviations
- st = stitch
- ch = chain stitch
- slst = slip stitch
- sc = single crochet
- increase = 2 sc in one stitch
- decrease = sc two stitches together
Elephant Body Pattern
Trunk
- Start with a magic ring of 6 sc.
- Rounds 2-4: Sc 6.
- Round 5: Increase in each st around (12 sc).
- Rounds 6-8: Sc 12.
- Round 9: 6 increases, then sc 6 (18 sc).
- Rounds 10-12: Sc 18.
- Round 13: 2 sc, increase repeat around (24 sc).
- Continue in this manner, increasing at each round till 36 sc.
Legs (Make 4)
- Start with a magic ring of 6 sc.
- Increase in each st around (12 sc).
- 1 sc, increase repeat around (18 sc).
- Only back loops, crochet 18 sc.
- Join the legs by sc those not broken off, forming a ring.
Body
- Continue from the joined legs, crocheting upwards and forming the body.
- Incorporate the trunk into the body with sc combining trunk and body stitches.
- Continue to close up the body, decreasing as necessary to form a rounded elephant body shape.
- Finish by securing all stitches and weaving in ends.
Additional Elements
Ears (Make 2)
- Ch 2, starting in the 2nd chain from the hook, perform 4 sc. Ch 1, turn.
- Increase pattern to widen the ears, continuing for a total of 5-6 rows and forming an ear shape.
Tusks (Make 2)
- Start with white yarn and sc a small pattern for each tusk.
Tail
- Chain 9, then starting in the second chain from the hook, establish the tail with increases and then straight stitches.
Hat and Ball
- Use contrasting colors to make a festive ball and cone-cap utilizing sc increases and standard sc rounds, finishing with a pompom on the cone-cap.
Assembly
- Attach all elements (ears, tusks, tail) to the body.
- Place safety eyes.
- Stuff sufficiently before closing all parts.
Note
- This pattern is for personal use only.
There you have it! Remember, varying the size of your hook and yarn might change the overall size of your Gustav, but the steps will remain the same. Enjoy crafting your very own crochet elephant!


Leave a Reply