Giant Shark Amigurumi
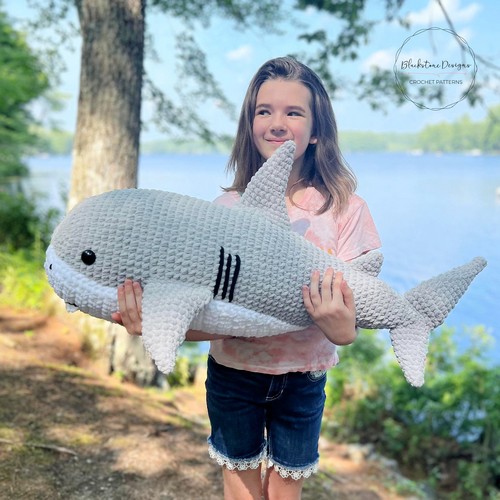
Uses: Like the name, this shark amigurumi is giant due to the use of bulky weight yarn and is perfect for older kids. Take it to the river trips or a place on the shelf of a boat lover. According to the designer, it can double as a pillow, but before doing this, make sure you use a yarn that doesn't peel off its color with time. Cotton is a nice option!
Materials:
- Super Bulky yarn
- 6.5mm crochet hook
Making: The body of the Giant Shark Amigurumi is crocheted in rounds using gray yarn! Starting with a magic ring, single crochet stitches progressively increased to create a rounded body for the shark. Safety eyes are inserted about halfway through the body construction to give the shark its character. The pectoral fins (side fins), dorsal fins (top fins), and caudal fins (tail fins) are crocheted using gray yarn. The fin typically starts with a magic ring, followed by increased stitches as you proceed, giving it a rounded, three-dimensional shape. The final step involves consolidating the various parts together. The belly patch is attached to the bottom of the body, with the fins strategically placed around the shark's body. The mouth and gills were stitched onto the body. Lastly, the shark's teeth are seamed under the mouthline.
Simon The Shark
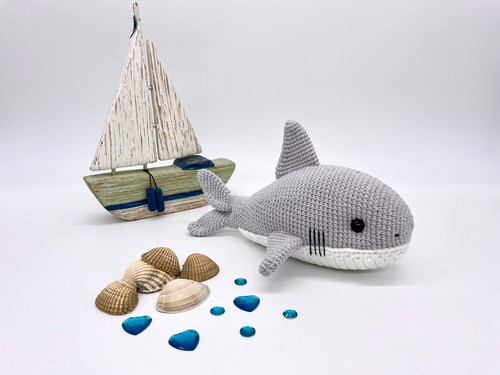
Uses: Befitting a star of the deep blue seas, Simon The Shark is as versatile as it is fascinating. This crocheted wonder can make waves as a charming addition to your kid's toy collection or even as an eye-catching decor for a marine-themed room.
Materials:
- Sport yarn
- 2.5mm crochet hook
Making:
The crochet shark begins at the front of the head, moving towards the tail. It involves various crochet techniques like magic ring, single crochet, and increases (two single crochet stitches in the same stitch). Once the 56th round is completed, the crocheting forms the tail. Safety eyes were placed between rounds 14 and 15. Before inserting the safety eyes, the artisan recommends placing pins with large heads to ensure symmetrical placement. The tail was created as an extension of round 56 from the body construction process, with the tail fins made separately and later attached. The tail fins are not stuffed but crocheted in a spiral pattern with increases, decreases (invisible decrease), and single crochet stitches.
Hammerhead Shark
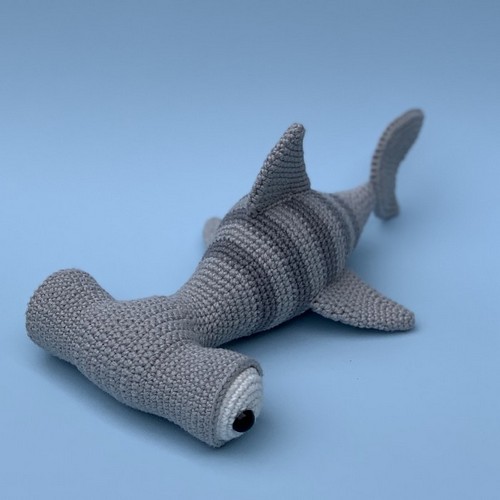
Uses: Creating a cuddly Hammerhead Shark that's bound to enchant anyone with its endearing gaze. Its flat, wide head and iconic look bring the distinctive charm of ocean life right into your home. This charming piece, perfect for a touch of cozy ocean magic, is a lovable companion and an adorable addition to any child's room.
Materials:
- Fingering yarn
- 2.75mm crochet hook
Making: The body of the Hammerhead Shark is crocheted using a series of techniques involving a magic ring, single crochet, increases and decreases (work 2 single stitches together for shape). The process begins from the tip of the shark's distinctive head towards the body, tail, and fins. Safety eyes are embedded to give life to the Hammerhead Shark, making it look more realistic. It's advisable to place these eyes symmetrically for an enhanced outlook. The shark's tail and fins are made separately and attached after the body has been formed.
Baby Shark Yellow
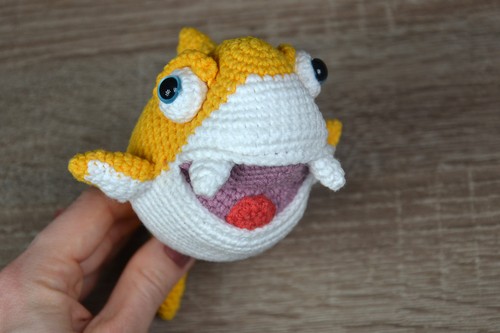
Uses: Everyone loves the adorable Yellow Baby Shark, a perfect buddy for little ones! It also adds a vibrant touch to any space, making it a beautiful decoration for nurseries or playrooms. Its cheerful appearance brings smiles and a warm atmosphere wherever it goes.
Materials:
- Sport yarn
- 2mm crochet hook
Making: The project begins with the head and body, which work as one piece, starting with yellow yarn. It uses the Amigurumi technique, featuring rounds of single crochet stitches. The pattern initiates with a magic ring, followed by a sequence of increases to form the circular body shape. Color changes from yellow to white and back to yellow are utilized to create the shark's underbelly effect. Eyes made with white yarn, filled, and attached to the body. The shark’s teeth can be crocheted from polymer clay as an alternative and then attached to the mouth area.

Leave a Reply