
Create a cute prehistoric pal with this Crochet Triceratops Amigurumi Pattern. It suits intermediate skill levels and guides you in creating a detailed, charming mini dinosaur.
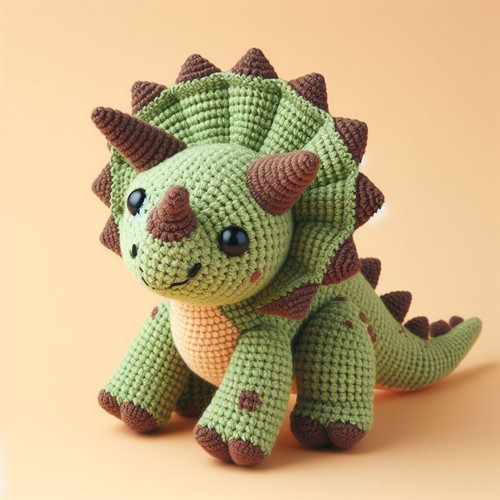
The Crochet Triceratops Amigurumi pattern creates a delightful, three-horned plush friend. This design involves crocheting small shapes (oval body, triangular horns, and four legs) and skillfully stitching them together. Boost your crochet skills while making this dino-shaped amusement—it's a testament to the intricate art of Amigurumi.
Step-by-step Guide
Materials:
- Worsted weight yarn in three colors (one for the main body, one for the horns and frill, and one for the eyes and details)
- Crochet hook in size appropriate for your yarn (3.5mm recommended)
- Fiberfill stuffing
- Yarn needle
- Scissors
- Stitch markers (optional)
- Safety eyes (optional)
Gauge:
18 stitches and 20 rows in single crochet = 4 inches (10.2 cm)
Body:
- Start with the primary body color. Make a magic ring.
- Crochet 6 single crochets (sc) into the ring, slip stitch to join.
- Increase six stitches evenly around (12 sc total).
- Continue crocheting in rounds, increasing six stitches evenly each round for seven rounds. There should be 78 stitches in total.
- Continue crocheting in rounds without increasing for 14 rounds.
- Decrease six stitches evenly around for three rounds. There should be 54 stitches in total.
- Stuff the body firmly.
- Decrease six stitches evenly around for two rounds. There should be 36 stitches in total.
- Decrease six stitches evenly around for 1 round. There should be 30 stitches in total.
- Stuff the neck firmly.
- Decrease six stitches evenly around for 1 round. There should be 24 stitches in total.
- Decrease six stitches evenly around for 1 round. There should be 18 stitches in total.
- Continue crocheting in rounds without decreasing for four rounds.
Horns and Frill:
- Switch to the horn and frill color.
- Make six sc into a magic ring.
- Increase six stitches evenly around (12 sc total).
- Continue crocheting in rounds, increasing six stitches evenly each round for two rounds. There should be 30 stitches in total.
- Continue crocheting in rounds without increasing for two rounds.
- Shape the horn by decreasing one stitch at the beginning and end of each round for eight rounds. There should be 14 stitches in total.
- Stuff the horn firmly.
- Decrease two stitches at the beginning and end of each round until two stitches remain.
- Fasten off and weave in ends.
- Repeat steps 2-9 to make the second horn.
- Make the frill by crocheting a chain 80.
- Slip stitch into the 2nd chain from the hook to create a ring.
- Crochet 1 sc in each chain around, and slip stitch to join.
- Continue crocheting in rounds, increasing one stitch evenly around each round for four rounds. There should be 84 stitches in total.
- Continue crocheting in rounds without increasing for eight rounds.
- Fasten off and weave in ends.
Head:
- Switch back to the primary body color.
- Make six sc into a magic ring.
- Increase six stitches evenly around (12 sc total).
- Continue crocheting in rounds, increasing six stitches evenly each round for four rounds. There should be 48 stitches in total.
- Continue crocheting in rounds without increasing for five rounds.
- Stuff the head firmly.
- Shape the head by decreasing six stitches evenly around for two rounds. There should be 36 stitches in total.
- Decrease six stitches evenly around for two rounds. There should be 30 stitches in total.
- Embroider eyes using black yarn or sew-on safety eyes.
- Attach the horns and frill to the head using the yarn needle.
- Sew the head to the body.
Legs and Tail:
- Make the legs and tail using the same method as the horns but with fewer stitches.
- Attach the legs and tail to the body using the yarn needle.
Finishing Touches:
- Weave in all ends.
- Add any other desired details, such as nostrils or a tongue.
I hope this helps you to create your Triceratops Amigurumi.


Leave a Reply