
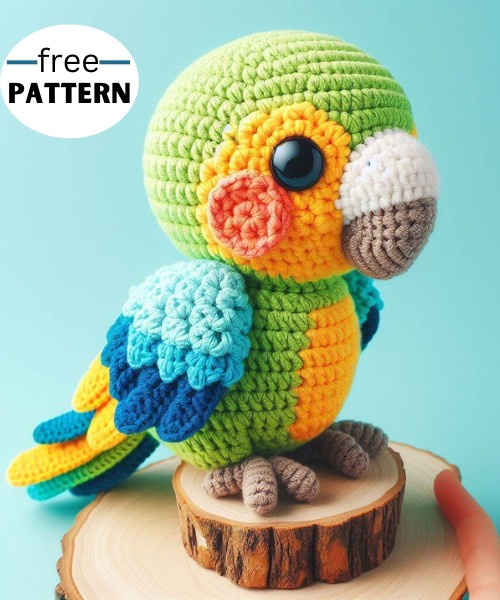
This crochet pattern offers a step-by-step guide to creating an adorable Parrot Amigurumi doll. It is ideal for beginners and pros and ensures a cute, handmade parrot amigurumi for decor or gifting.
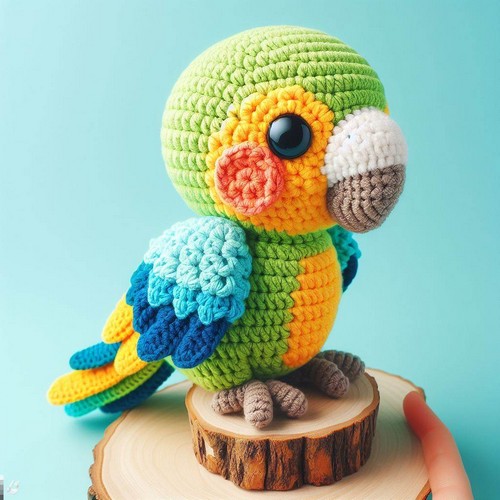
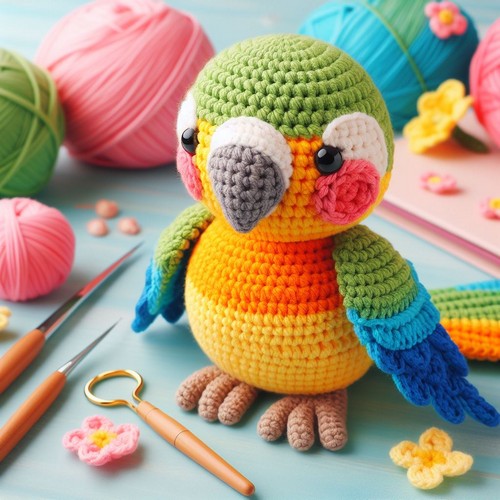
Create an adorable Crochet Parrot Amigurumi with this fun and easy-to-follow pattern. This whimsical parrot showcases a range of vibrant colors, intricate stitches, and unique shaping, resulting in a 3D toy that is sure to delight. Stitch by stitch, watch as your charming crocheted friend comes to life with its vibrant plumage and charming expression.
Step-by-step Guide
Materials:
- Yarn:
- Green (main color)
- Red (wings, beak, and feet)
- Yellow (head and chest)
- Black (eyes)
- Orange (beak)
- 3.25mm crochet hook
- Polyester stuffing
- 9mm safety eyes
- Tapestry needle
Body:
- Green yarn: Make a magic ring and ch 6 sc into the ring.
- Green yarn: Inc in each st around (12 sc).
- Green yarn: Continue crocheting rounds of sc, inc in every other st until there are 36 sts.
- Green yarn: Crochet 7 rounds of sc without increasing.
- Stuff the body firmly with stuffing.
- Green yarn: Crochet 5 more rounds of sc without increasing.
- Close the hole in the body by pulling the working yarn tight and weaving in the ends.
Head:
- Yellow yarn: Attach to the top of the body and crochet 6 sc.
- Yellow yarn: Inc in each st around (12 sc).
- Yellow yarn: Crochet 2 rounds of sc without increasing.
- Stuff the head firmly with stuffing.
- Yellow yarn: Crochet 3 more rounds of sc without increasing.
- Close the hole in the head by pulling the working yarn tight and weaving in the ends.
Beak:
- Orange yarn: Make a magic ring and ch 6 sc into the ring.
- Orange yarn: Turn your work and sc in each st back down the ch.
- Orange yarn: Sc in the next 3 sts of the starting round, then Dec.
- Orange yarn: Rep the last 2 sts 2 more times to finish shaping the beak.
- Weave in the ends.
Eyes:
- Black yarn: Sew on the safety eyes above the beak.
Wings (make 2):
- Red yarn: Make a magic ring and ch 15 sc into the ring.
- Red yarn: Turn your work and sc in each st back down the ch.
- Red yarn: Sc in the next 3 sts of the starting round, then Dec.
- Red yarn: Rep the last 2 sts 5 more times to finish shaping the wing.
- Weave in the ends.
- Repeat steps 1-5 to make the second wing.
Tail:
- Green yarn: Make a magic ring and ch 15 sc into the ring.
- Green yarn: Turn your work and sc in each st back down the ch.
- Close the hole in the tail by pulling the working yarn tight and weaving in the ends.
Feet (make 2):
- Red yarn: Make a magic ring and ch 6 sc into the ring.
- Red yarn: Turn your work and sc in each st back down the ch.
- Red yarn: Sc in the next 3 sts of the starting round, then Dec.
- Red yarn: Rep the last 2 sts 2 more times to finish shaping the foot.
- Weave in the ends.
- Repeat steps 1-5 to make the second foot.
Assembly:
- Sew the beak to the bottom of the head.
- Sew the wings to the sides of the body.
- Sew the tail to the back of the body.
- Sew the feet to the bottom of the body.
Optional details:
- You can add a crest to the head with red yarn.
- You can add stripes to the wings with green and yellow yarn.
Here are some additional tips for crocheting amigurumi:
- Use a stitch marker to mark the beginning of each round.
- If you have trouble stuffing the body, use a chopstick or other blunt object to push the stuffing in.
- Be careful not to overstuff the body, making the other parts difficult.
I hope this helps you crochet your own adorable little parrot amigurumi!


Leave a Reply