
The Crochet Holiday Stocking Pattern is a delightful way to make your own festive stocking. This guide is simple and perfect for anyone wanting to add a personal touch to their holiday decor. Making your stocking with this pattern will bring extra warmth and cheer to your fireplace or holiday display.
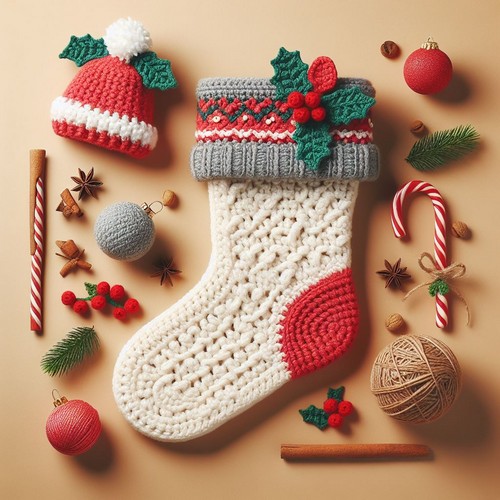
Crochet Holiday Stocking Pattern
The Crochet Holiday Stocking Pattern is an excellent guide for creating a classic, festive stocking with a homemade touch. This easy-to-follow pattern yields a colorful, intricate design synonymous with Christmas cheer. Suitable for hang-filling with gifts or for traditional decoration, the completed crochet stocking infuses a charmingly festive ambiance into any household, enhancing the holiday spirit while showcasing the crafter's skill and creativity.
Making Your Crochet Holiday Stocking
Materials:
- Red yarn (main color)
- White yarn (for cuff and details)
- Small amount of black, green, and yellow yarn (for details)
- Crochet hook (size depends on yarn weight)
- Tapestry needle
- Scissors
Step by step Pattern
-
Back panel:
- Using red yarn, chain a desired number of stitches (around 40-50 for this size stocking).
- Single crochet back and forth in rows, increasing one stitch at the beginning of each row.
- Continue crocheting until the piece reaches the desired height for the back panel of the stocking.
- Fasten off and weave in ends.
-
Heel flap:
- With the right side of the back panel facing you, fold the bottom flap up to create a triangle. The number of rows to fold will depend on your desired heel depth.
- Single crochet across the folded flap to join the sides.
- Chain one and turn your work.
- Single crochet across the top of the heel flap, turning at the end of each row.
- Continue crocheting rows, decreasing one stitch at the beginning of each row until there are few stitches remaining.
- Fasten off and weave in ends.
-
Gusset:
- With the right side of the stocking facing you, pick up stitches along the sides of the heel flap and the back panel. You can use single crochets or a different stitch like slip stitches for picking up stitches.
- Continue crocheting around the gusset, joining the sides of the stocking.
- Increase stitches at the corners of the gusset as needed to create a rounded shape.
-
Toe:
- Once the gusset reaches the desired width, continue crocheting in rounds, decreasing stitches at evenly spaced intervals around the toe to close the opening.
- Fasten off and weave in ends.
-
Cuff:
- Using white yarn, chain a desired number of stitches (slightly less than the width of the stocking opening).
- Join with a slip stitch to form a ring.
- Single crochet in rounds, working in back loops only to create a ribbed texture.
- Crochet to a desired cuff height and fasten off.
- Sew the cuff onto the top opening of the stocking.
-
Embellishments:
- You can add various details to your stocking using embroidery or applique techniques.
- Use black yarn to embroider a small coal design on the toe.
- Use green and yellow yarn to embroider a holly leaf and berry design on the cuff.
Tips:
- You can adjust the size of the stocking by using different yarn weights and crochet hook sizes.
- You can also customize the design by using different colors and adding different embellishments.
- Be sure to crochet evenly and maintain consistent tension throughout your work.


Leave a Reply