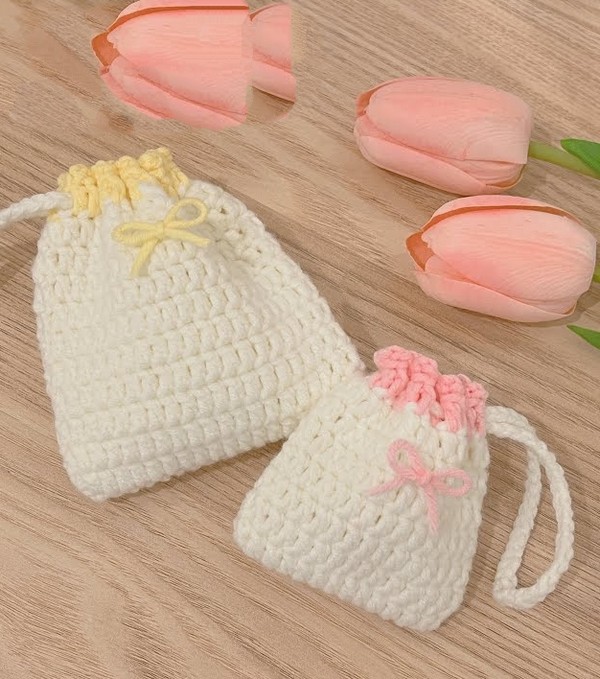
Ready to add a handmade touch to your collection or gift someone a special little something? This crochet drawstring pouch is the perfect project to dive into. Whether you're a crochet newbie or have yarn and hook in hand as constant companions, making one of these pouches brings joy and a sense of accomplishment. Follow this pattern to create a beautiful, functional piece that's snug enough for treasures and durable for everyday use. Let's get on this creative project together and craft a drawstring pouch that's as delightful to make as it is to use or give away.

Discover a delightful crochet adventure with this beginner-friendly drawstring pouch pattern! Perfect for crafters of any skill level, the design is showcased in the easy-to-follow video tutorial link provided. This adorable pouch is customizable in size and colour, making it a versatile project for personal use or as a charming gift. The pattern ensures a smooth crafting experience, enabling you to create a practical and stylish accessory in no time. Whether you're new to crocheting or looking to add a quick project to your collection, this pattern is a joy to make!
Making The Crochet Drawstring Pouch
Materials:
- 5 PLY milk cotton yarn in two colors
- 3 mm hook (or size matching your yarn)
- Darning needle
- Stitch marker
- Scissors
Step by step Pattern
Foundation Chain:
- Start: Using white yarn (or purple for a Kirby pouch variant), create a slipknot.
2.: Chain 21 stitches.
Round 1 (Starting the Pouch):
- Double Crochet (DC): Yarn over, insert the hook into the 3rd chain from the hook, yarn over again and pull through the chain (3 loops on hook), yarn over and pull through the first 2 loops, yarn over again and pull through the remaining 2 loops.
- Place a stitch marker in the first DC to mark the beginning of the round.
- Continue to DC in each chain across the foundation chain.
- Turning Point: In the last chain, place 3 DCs to create a curved edge.
- Continue towards the bottom side of the foundation chain, placing 1 DC in each stitch across.
Rounds 2, 3, to Desired Length:
- Repeat the DC process round-by-round.
- Chain 2 at the beginning of each round for height.
- Insert the first DC of each round in the stitch next to the chain 2.
- Continue with 1 DC in each stitch around.
- Slip stitch to the first DC of the round (where the stitch marker is) to close each round.

Colour Change (Optional):
- To introduce a new color (e.g., for the last round), attach the new yarn with a slip stitch and cut off the previous color.
- Continue the pattern in the new color as before.
Final Round (Edging):
- Chain 3, skip a stitch, then slip stitch into the next stitch. Repeat this pattern around the pouch for a scalloped edge.
- Complete the round with a slip stitch, fasten off, and weave in ends.
Drawstring Strap:
- Using the yarn, create a long chain (foundation chain length) that can wrap around the pouch with extra length for tying.
- Weave the chain in and out along the second-to-last round of the pouch to function as a drawstring.
- Fasten the ends together or leave tails for tying.
Finishing Touches:
- Optional: Add decorative elements like a bow or flower at the drawstring’s knot or elsewhere on the pouch for personalization.
- Weave in any remaining loose ends for a clean finish.


Leave a Reply