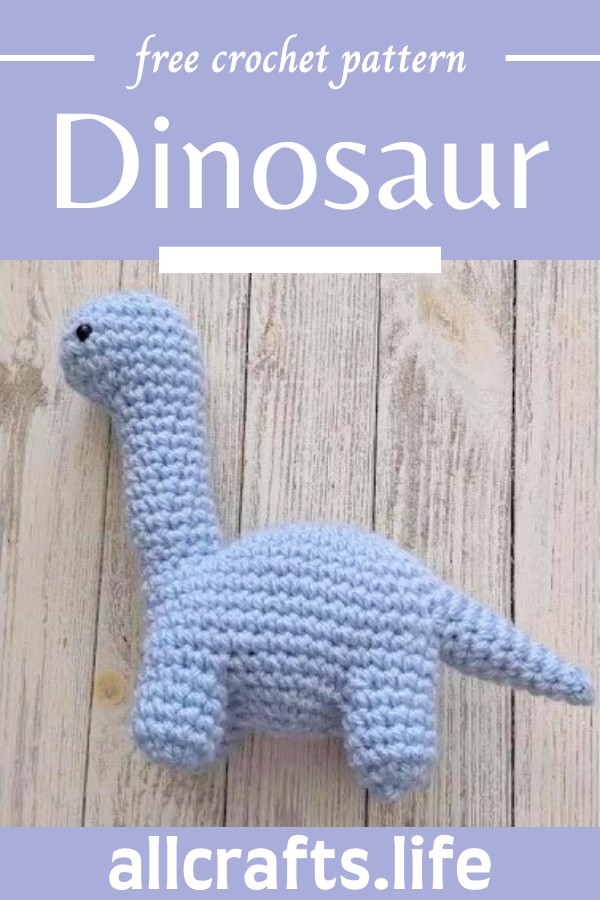
Make your own adorable Bronto the Dinosaur with our easy-to-follow No-Sew Crochet Amigurumi Pattern! Perfect for beginners and seasoned crocheters alike, this pattern brings to life a cuddly dinosaur friend without the need for any sewing.
Using just your crochet hook and some yarn, you'll learn to create Bronto from start to finish. With clear instructions and a dash of creativity, you'll have a delightful dinosaur companion in no time. This is a fantastic project for anyone looking to dive into the world of amigurumi or to add a prehistoric pal to their collection.
Bronto the Dinosaur No-Sew Crochet Amigurumi

Materials
- Yarn: Medium weight (also known as worsted, aran, or size 4) yarn in colors that match the dinosaur design you have in mind. You might want green for the body, with a contrasting color for the spikes or underbelly.
- Crochet Hook: A hook that corresponds well with medium weight yarn, often a size E-4 to G-6 (3.5mm to 4mm) hook is recommended for tightly worked amigurumi projects.
- Safety Eyes: The size may vary according to the pattern, but 6mm to 12mm are common sizes for amigurumi. Some projects might not use safety eyes, opting instead for embroidered or crocheted eyes.
- Stuffing: Polyester fiberfill is the most common choice for stuffing amigurumi, giving the project a soft, plush feel.
- Stitch Marker: To mark the beginning of the round since amigurumi is often worked in continuous rounds.
- Yarn Needle: For weaving in ends and assembling parts of the amigurumi.
- Scissors: For cutting yarn.
Part One: The Hump
- Start: Make a slip knot and chain seven.
- Round One: Begin at the second chain from the hook, work towards the end, make an increase in the last stitch, rotate the chain (bottom strands now become top), insert hook into top strand, make an increase in the last stitch.
- Continue: Work around the formed oval to complete the hump.
Part Two: The Head and Neck
- Start: Use a magic ring.
- Initial Rows: After the magic ring, insert six single crochets.
- Adding Features: Close the magic ring, work a few rows, place safety eyes after removing stitch markers.
- Continue Pattern: Work through row 19 with decreases; a visible decrease technique is preferred. Insert the hook into just the front strands of the stitches for the decrease.
- Prepare for joining to the body by ensuring the last stitch leaves the yarn end aligned with the back of the neck; stuff the head and neck with fiberfill.
For Part Three: The Body
- Joining Pieces: Line up the head/neck with the hump, ensuring correct orientation. Join with slip stitches and single crochets.
- Body Rounds:
- Once around the head, continue on the body.
- At row three, chain six and skip six for the tail hole, then continue in the pattern.
- For the legs, chain five, skip seven stitches for leg holes, and continue.
- Use a single crochet two together instead of a decrease for shaping around leg and tail holes.
- Completing the Body: Work around, insert the hook into chain spaces for legs and tail as described to smooth transitions.
Part Four: The Tail and Legs
- Tail: Start with a slip stitch on the body for the base of the tail; use single crochet two together through the body stitches, then continue around the tail.
- Legs: Similar to the tail, attach yarn with a slip stitch, create a single crochet two together for the first leg stitch, and continue around each leg.
- Finishing: Stuff the dinosaur and weave in all ends.


Leave a Reply