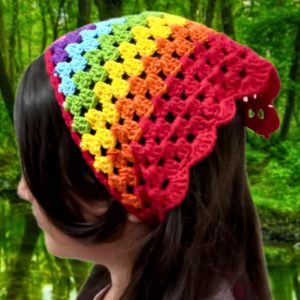
Keep your style on-point even as the summer warmth embraces you, with this delightful crochet bolero pattern. It's a perfect addition to your wardrobe, adding a touch of elegance to your summer outfits while providing a cozy, lightweight layer. This modern crochet accessory pattern is straightforward and a joy to create, allowing you to craft a practical piece that's both stylish and comfortable. Pick up your crochet hook and let's start making fashion that feels good to wear any time of the sun-kissed days ahead.

Charming Pixie Bolero is an exquisite crochet pattern perfect for adding a touch of warmth to your summer attire. This delightful creation is not only simple to craft but versatile in style, offering two distinct ways to wear it. Made with soft, DK yarn and a 4mm hook, the bolero features a relaxed, lacy texture. The design calls for two panels, each lovingly fastened with quaint buttons, adding a personal touch. Adjustable for all the sizes the Pixie Bolero is sure to become a cherished piece in your wardrobe.
Making The Crochet Bolero
Materials Needed:
- Scissors
- Darning Needle
- Crocodile Clips (Optional, for trial fitting)
- Crochet Hook: 4mm (Go up half a hook size from what you usually use for DK yarn)
- Yarn: Wendy Supreme Luxury Cotton DK (or any DK yarn suitable for a 4mm hook). The example uses a pink color called Blush. You'll need two balls of yarn.
- Buttons: You need six, ideally matching the size of your crochet loops.
Pattern Overview:
Gauge: Adjust hook size if necessary to obtain correct gauge.
Note: This pattern is for a size that fits the creator’s specification. Adjustments might be necessary for different sizes.
Step by step Pattern
Creating the Panels:
- Foundation Chain: Start by making a slip knot and chain 137 (This is 136, which is a multiple of 8, plus 1 for turning).
- Row 1 (Setup Row): Chain 1 (does not count as a stitch). This is your turning chain. Turn your work.
- Perform a dc (double crochet) in the first chain from your hook (the 137th chain you made).
- Chain 1, skip a chain, double crochet in the next chain. Repeat from * to * across. You should end up with 68 boxes (created by one dc, one chain gap, one dc).
- Row 2: Chain 1 and turn. Double crochet across every stitch (both the double crochets and the chain spaces of the previous row). This gives you a solid row of 137 double crochets.
Pattern Repeat:
Starting from Row 3, you will enter into the pattern repeat sequence that creates the fabric's texture.
- Row 3-8: These rows are the core pattern that will be repeated throughout.
- Row 3 (Double Crochet Row): A full row of double crochets, working one double crochet into each stitch from the previous row.
- Row 4 (Box Row): Repeat the process of creating boxes as in the setup row.
- Row 5 (Loop Row): Chain 5, skip 3 stitches, and single crochet into the next stitch. Repeat across. You'll create loops that will be the foundation for your shell stitches.
- Row 6 (Shell Row): Work 3 dc, chain 1, 3 dc into the first loop, single crochet into the next loop. Repeat to across. This creates your shell pattern.
- Row 7 (Box Adjustment Row): Chain 4, single crochet into the next chain space (to adjust the boxes to align well with the shell rounds).
- Row 8 (Box Restoration Row): Create boxes similar to the setup row to prepare for the next series of pattern repeats.

Completing the Panels:
- Repeat rows 3-8 until the panel reaches your desired size. The video suggests working until you have 32 rows, then adding one more double crochet row and one more box row to finish.
Construction:
- Joining Panels: Lay panels with wrong sides together. Join shoulders by attaching yarn with a slip stitch and single crochet along the top edges of the panels matching stitch to stitch, leaving an opening for the neck.
- Finishing the Edges: Clean up any loose ends, and add a border of single crochets around the entire garment if desired for a more finished look.
- Attaching Buttons: Sew buttons along one edge of the bolero. They are decorative but also functional if you create buttonholes during the edge-finishing step.
Additional Notes:
- The bolero can be worn two ways: with the buttons in the front for a v-neck look, or with the buttons at the back for a more traditional bolero appearance.
- Remember to block your pieces if necessary to achieve the correct size and to even out the stitches.
Final Touches:
Try on your bolero, adjusting button placement if necessary to ensure a comfortable fit. Enjoy your beautiful, handmade Pixie Bolero!


Leave a Reply