
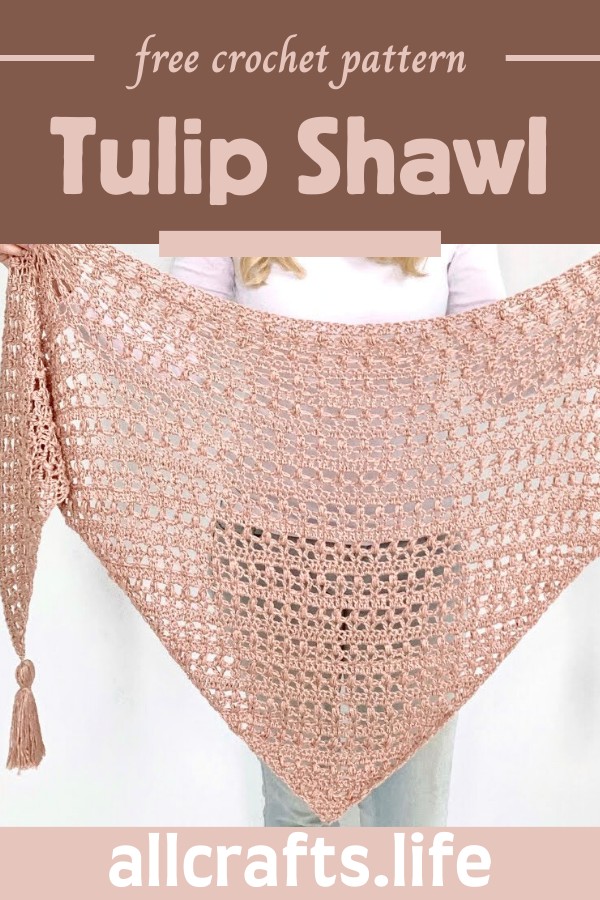
Crafting comfort and style, this Crochet Vintage Tulip Shawl Pattern invites you to create a triangle shawl adorned with the crochet tulip stitch. Guiding you through each step, from the initial slip knot to the final puff stitch, the instructions are straightforward, and aimed at bringing this beautiful design to life. A blend of double crochets, puff stitches, and chain spaces, the hustle-free pattern evolves, revealing a delicate yet striking appearance. Perfect for beginners and seasoned crocheters alike, this crochet accessory promises warmth and a touch of sparkle to any outfit.
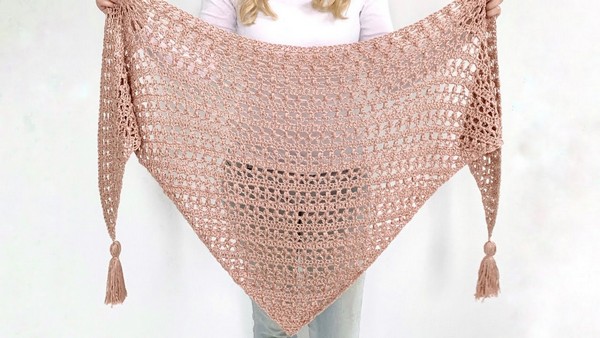
Crochet Vintage Tulip Shawl Pattern
Materials:
- 3 balls of Lion Brand Truboo Sparkle yarn (or similar)
- 6mm crochet hook
Step by step Pattern
Starting:
- Start with a slip knot and chain 4.
- Work 3 double crochet (dc) stitches in the 4th chain from your hook.
- Turn your work. (Note: turning chains do not count as a stitch).
Row 2:
- Chain 3.
- Work 3 dc in the first stitch.
- Work 1 dc in the next stitch.
- Work 3 dc in the last stitch.
- Turn your work.
Row 3:
- Chain 3.
- In the first stitch, work 2 dc, chain 1, 1 dc.
- Skip 2 stitches, then in the next stitch work 1 dc, chain 1, 1 dc. Repeat - until the end of the row.
- Skip the last 2 stitches, in the last stitch work, 1 dc, chain 1, 2 dc.
- Turn your work. (You will have a total of 3 chain spaces).
Row 4:
- Chain 3.
- In the first stitch, work a dc and a puff stitch.
- Chain 1, work a puff stitch in the next chain space. Repeat - until the end.
- End with chain 1, then a puff stitch, and a dc in the last stitch.
- Turn your work. (You should have a total of 5 puff stitches).
Row 5:
- Chain 3.
- Work 3 dc in the first stitch.
- Work 1 dc in the next puff stitch, and 2 dc in the next chain space. Repeat - until the end.
- End with a dc in the last puff stitch, and 3 dc in the last stitch.
- Turn your work. (You will have a total of 19 dc stitches).
Repeat Pattern:
- Repeat Row 3, Row 4, and Row 5 until you reach Row 50, following the established increase pattern to maintain the triangular shape of the shawl.
Overview:
- An overview is provided in the video to guide you on the number of stitches you should have at the end of each row.
Optional:
- You can add tassels to the shawl for decoration. There's a quick tutorial included in the video on how to make them.
Closing:
- That concludes the step-by-step pattern for the Vintage Tulip Shawl as described in the video.
Remember, always turn your work at the end of each row, and the turning chains do not count as a stitch unless otherwise noted. Enjoy your crafting, and I hope you find this shawl as beautiful to make as it is to wear!


Leave a Reply