
Create a cute crochet version of DC's Green Arrow with this pattern. It is ideal for intermediate skill levels and includes step-by-step instructions for shaping, assembly, and finishing.
![]()
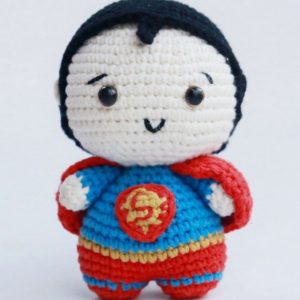
Make a charming Green Arrow Amigurumi using your crochet skills. With intricate detailing, this delightful pattern features a cylindrical body, a vibrant green hood, and a miniature quiver brimming with arrows. The amigurumi stands upright with miniature feet, a masked face, and muscular arms clutching a tiny bow. It calls for intermediate-level skills, offering a rewarding project that brings your favorite comic book hero to life!
Step-by-step Guide
Materials:
- Green yarn: light worsted weight in two shades (darker and lighter)
- Black yarn: light worsted weight
- Flesh-tone yarn: light worsted weight
- White yarn: light worsted weight
- Yellow yarn: light worsted weight
- Brown yarn: light worsted weight
- Safety eyes (9mm)
- Tapestry needle
- Polyester stuffing
- Crochet hook 3.5mm
![]()
Body:
- Head: Using flesh-tone yarn, start with 6 single crochets in a magic circle. Increase in each stitch (12 sts). Continue increasing in every other stitch until you have 36 sts. Crochet 6 rounds without increasing. Decrease in every other stitch until you have 18 sts. Stuff the head firmly and close the hole with a slip stitch.
- Torso: Using dark green yarn, repeat step 1 for the head, increasing until you have 36 sts. Crochet 12 rounds without increasing. Decrease in every other stitch until you have 18 sts. Continue decreasing until you have 6 stitches, and close the hole with a slip stitch.
Head details:
- Hair: Attach brown yarn to the top of the head and crochet a round of single crochets. Work rows of back-and-forth single crochets, shaping the hair as desired. You can tie the hair in sections for braids or leave it loose.
- Face: Embroider eyebrows and mouth with black embroidery floss. Attach safety eyes.
Body details:
- Arms: Make two flesh-tone arms by chaining 8 sts, single crocheting in each stitch, turning your work, and repeating until the desired length is reached. Stuff lightly and close the hole with a slip stitch. Repeat for the other arm. Sew arms to the torso.
- Legs: Make two green legs by chaining 12 sts, single crocheting in each stitch, turning your work, and repeating until the desired length is reached. Stuff firmly and close the hole with a slip stitch. Repeat for the other leg. Sew legs to the bottom of the torso.
Green Arrow attire:
- Hood: Using dark green yarn, chain 8 sts, and single crochet in each stitch. Turn your work and repeat, increasing 1 stitch at the beginning and end of each row until you have the desired hood width. Crochet several rows without increasing to establish the hood length. Then, decrease 1 stitch at the beginning and end of each row until you have 8 sts remaining. Close the hole with a slip stitch.
- Mask: Using black yarn, chain 6 sts and single crochet in each stitch. Turn your work and repeat, increasing 1 stitch at the beginning and end of each row until the mask reaches the desired width. Crochet several rows without increasing to establish the mask length. Then, decrease 1 stitch at the beginning and end of each row until you have 6 sts remaining. Close the hole with a slip stitch. Cut two small circles from black felt for the eyeholes and glue them to the mask.
- Shirt: Using lighter green yarn, crochet a cylinder slightly wider than the torso to create the shirt. Add details like sleeves and a V-neckline with embroidery floss.
- Gloves: Make two fingerless gloves using flesh-tone yarn and single crochet. Add black embroidery floss details for knuckles and finger joints.
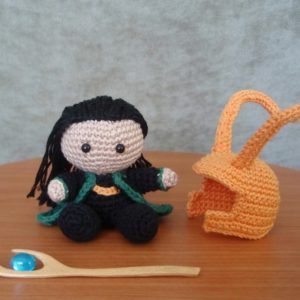
Accessories:
- Quiver: Using brown yarn, crochet a long rectangle and fold it in half to create a pouch. Add straps with black yarn.
- Arrows: Cut small yellow rectangles and glue brown yarn triangles to the ends for fletching.
Assembly:
- Sew the hood to the head, mask to the face, and shirt to the torso.
- Attach the quiver to the back of the torso and the arrows to the quiver or belt.
- Add any other desired details, like a bow and arrows, using embroidery floss or other embellishments.
Remember, this is just a general guide, and you can customize it to create your own unique Green Arrow amigurumi. Feel free to adjust the colors, details, and accessories to match your preferred version of the superhero. Happy crocheting!
![]()


Leave a Reply