
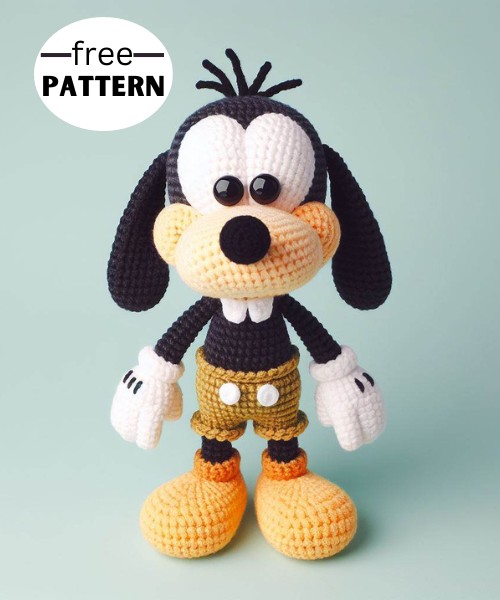
Create your adorable Goofy amigurumi with this detailed crochet pattern. Ideal for fans of Disney characters or unique handmade gifts.
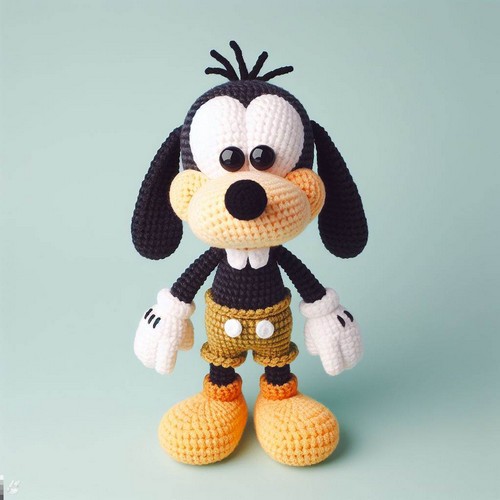
The Crochet Goofy Amigurumi Pattern is a beautiful project for crochet enthusiasts. Using colorful yarns, the pattern creates a 3D figure of Disney's beloved character, Goofy, in a cartoon-like style. The design highlights Goofy's iconic hat, turtleneck, trousers, and shoes in vibrant colors. With step-by-step instructions, this project is easy to follow and complete, bringing back nostalgic memories for those who grew up with Goofy.
Step By Step Guide
Materials:
- 4.0 mm crochet hook
- Worsted weight yarn in black, white, orange, red, yellow, and brown
- 9mm safety eyes
- Poly-fil stuffing
- Tapestry needle
Body:
- Start with black yarn and make a magic ring.
- Crochet 6 single crochets (sc) into the ring.
- Increase to 12 sc by crocheting 2 sc in each sc around.
- Continue crocheting in rounds of sc, increasing 6 sc evenly each round until you have 36 sc.
- Crochet 10 rounds of SC without increasing.
- Stuff the body firmly.
- Crochet 6 more rounds of sc, then decrease 6 sc evenly each round until you have 12 sc.
- Close the hole by crocheting 2 sc together, then tie off and weave in the ends.
Legs:
- With black yarn, make a magic ring and crochet 6 sc into the ring.
- Increase to 12 sc by crocheting 2 sc in each sc around.
- Crochet 16 rounds of sc.
- Stuff the leg firmly.
- Crochet 7 rounds of sc, then decrease 2 sc evenly each round until you have 4 sc.
- Close the hole by crocheting 2 sc together, then tie off and weave in the ends.
- Repeat steps 1-6 for the second leg.
Arms:
- With black yarn, make a magic ring and crochet 6 sc into the ring.
- Increase to 12 sc by crocheting 2 sc in each sc around.
- Crochet 14 rounds of sc.
- Stuff the arm firmly.
- Crochet 6 rounds of sc, then decrease 2 sc evenly each round until you have 4 sc.
- Close the hole by crocheting 2 sc together, then tie off and weave in the ends.
- Repeat steps 1-6 for the second arm.
Head:
- With white yarn, make a magic ring and crochet 6 sc into the ring.
- Increase to 12 sc by crocheting 2 sc in each sc around.
- Continue crocheting in rounds of sc, increasing 6 sc evenly each round until you have 48 sc.
- Crochet 18 rounds of sc without increasing.
- Stuff the head firmly.
- Crochet 6 more rounds of sc, then decrease 6 sc evenly each round until you have 12 sc.
- Close the hole by crocheting 2 sc together, then tie off and weave in the ends.
Ears:
- With white yarn, make a magic ring and crochet 6 sc into the ring.
- Increase to 12 sc by crocheting 2 sc in each sc around.
- Crochet 8 rounds of SC without increasing.
- Change to black yarn and crochet 2 rounds of sc.
- Tie off and weave in the ends.
- Repeat steps 1-5 for the second ear.
Facial features:
- Sew on the 9mm safety eyes.
- With black yarn, embroider a small nose and mouth.
- With red yarn, embroider a small tongue.
Hat:
- With orange yarn, make a magic ring and crochet 6 sc into the ring.
- Increase to 12 sc by crocheting 2 sc in each sc around.
- Continue crocheting in rounds of sc, increasing 6 sc evenly each round until you have 36 sc.
- Crochet 13 rounds of sc without increasing.
- Fold the brim of the hat up and sew it in place.
- Attach a small pom-pom to the top of the hat.
Assembly:
- Sew the arms and legs to the body.
- Sew the ears to the top of the head.
- Sew the head to the body.
Your Goofy amigurumi is complete! You can customize it by adding additional features like eyebrows or eyelashes.


Leave a Reply