
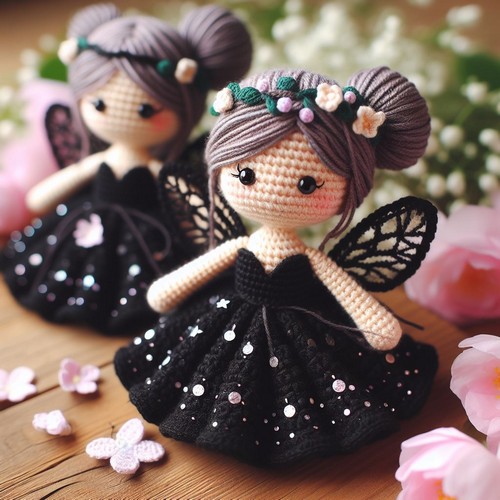
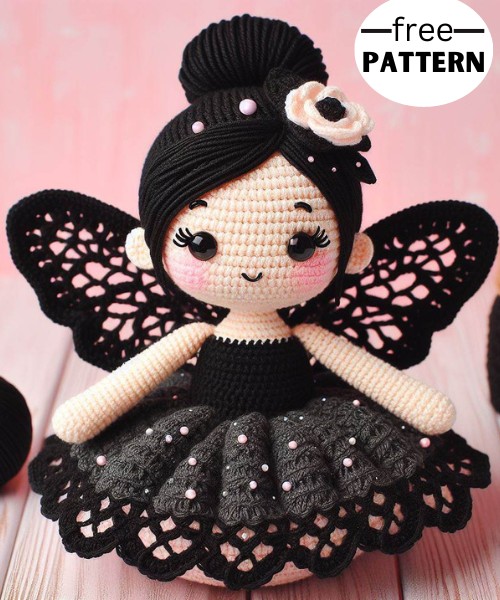
Explore step-by-step instructions to make your fairytale-inspired amigurumi in this exciting Crochet Amigurumi Doll In Fairy Dress Pattern. Perfect for beginners and experts alike!

The Crochet Amigurumi Doll in Fairy Dress Pattern is a fun crochet design. Featuring a charming, whimsical doll wrapped in a fairy-style dress, the pattern involves intricate crochet work focusing on the amigurumi technique. Shaping the doll’s unique details, from her sparkling eyes to her delicate wings, makes it captivating.
Step-by-step Guide
Materials
- Yarn in color of choice for skin, hair, dress, fairy wings, shoes, and accessories
- Crochet hook compatible with your yarn weight (size recommended on the yarn label)
- Safety eyes
- Polyester fiberfill for stuffing
- Stitch marker
- Scissors
- Yarn needle
Abbreviations
- MR: Magic Ring
- ch: Chain
- SC: Single Crochet
- HDC: Half Double Crochet
- DC: Double Crochet
- INC: Increase (2 SC in the same stitch)
- DEC: Decrease (SC 2 stitches together)
- BLO: Back Loop Only
- FLO: Front Loop Only
- Sl st: Slip stitch
- FO: Fasten off
Doll Pattern
Head
- Start with skin color yarn, and make an MR, and SC 6 into it.
- Round 1: INC in each stitch around (12 SC).
- Round 2: [SC, INC]*6 (18 SC).
- Round 3: [SC 2, INC]*6 (24 SC).
- Round 4: [SC 3, INC]*6 (30 SC).
- Round 5-10: SC in each stitch around (30 SC).
- Attach safety eyes between rounds 5 and 6, leaving approximately 6-7 stitches between them. Start filling the head with fiberfill.
- Round 11: [SC 3, DEC]*6 (24 SC).
- Round 12: [SC 2, DEC]*6 (18 SC).
- Round 13: [SC, DEC]*6 (12 SC).
- Add more stuffing to the head if necessary, then FO, and cut the yarn, leaving a long tail for sewing later. Set the head aside.
Body
- Start with the dress color yarn. Make an MR and SC 6 into it.
- Round 1: INC in each stitch around (12 SC).
- Round 2: [SC, INC]*6 (18 SC).
- Round 3: [SC 2, INC]*6 (24 SC).
- Round 4-5: SC in each stitch around (24 SC).
- FO, and leave a long tail for sewing. Sew the body onto the head.
Arms (make 2)
- Start with skin color yarn. Make an MR and SC 5 into it.
- Round 1-5: SC in each stitch around (5 SC).
- Change to dress color yarn.
- Round 6-8: SC in each stitch around (5 SC).
- Stuff the arm lightly.
- FO, leaving a long tail for sewing. Sew the arms to the body, positioning each arm between rounds 3 and 4 of the body.
Legs (make 2)
- Start with shoe color yarn. Make an MR and SC 6 into it.
- Round 1: INC in each stitch around (12 SC).
- Round 2: SC in each stitch around in BLO (12 SC).
- Round 3-4: SC in each stitch around (12 SC).
- Change to dress color yarn.
- Round 5: SC in each stitch around (12 SC).
- Stuff the leg and shoe.
- FO, leaving a long tail for sewing. Sew each leg to the bottom of the body.
Skirt
- Attach dress color yarn to the body's unworked FLO of round 2.
- Round 1: [2 DC, Ch 2, Sl st in the same stitch, Sl st in the next 2 stitches]*6
- FO and weave in the ends.
Hair
- Follow the crochet hair cap pattern and attach it to the head. Then, add strands of yarn to create the hairstyle of your choice.
Fairy Wings
- Start with wing color yarn. Chain 15 and join with a Sl st to form a loop.
- Round 1: Chain 1, SC 24 evenly around the loop, join with a Sl st to the beginning SC.
- Round 2: Ch 3 (counts as first DC), 2 DC in the same stitch, [3 DC, ch 3, 3 DC] in the next stitch, 3 DC in the next, [3 DC, ch 3, 3 DC] in the next stitch, DC 3 in the next, join with a Sl st in the top of the beginning Ch 3.
- FO, leaving a long tail for sewing. Sew the wings to the back of the dress, below the arms.
Finishing Touches
- Add desired accessories and details to the doll, such as embroidering a face, a wand, or sewing a small flower to her hair.
Now your Crochet Amigurumi Doll In Fairy Dress is complete!


Leave a Reply