
Imagine wrapping yourself in the warmth and joy of daisies. Elevate your look with this charming Crochet Daisy Scarf Pattern. It's a delightful way to add a burst of sunshine to your wardrobe, especially if you love making things by hand. This crochet accessory pattern is designed to be simple, making it just right for anyone from beginners to more experienced crochet enthusiasts. As you follow the steps, you'll see your scarf come to life, stitch by stitch, turning yarn into a beautiful accessory.
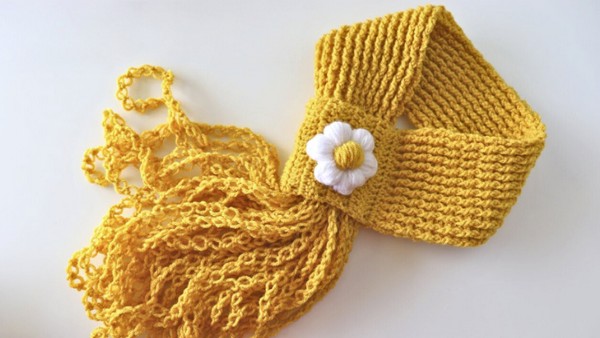
The Crochet Daisy Scarf Pattern boasts a cheerful design with a standout oversized daisy as the centrepiece. Its petals, worked in a striking white contrasted against a sunny yellow centre, create a playful and eye-catching motif. The scarf's background is a soft, inviting shade that complements the flower, making the pattern pop. The rest of the scarf is crafted with a gentle yet solid stitch that ensures warmth and durability. Its appearance is both fresh and stylish, perfect for adding a dash of springtime flair to any outfit.
Making The Crochet Daisy Scarf
Materials Needed:
- Medium yarn (Lion Brand Yarn’s Vanna's Choice; Category 4)
- Bulky yarn (Ranita from Tanya; Category 5)
- 5.5mm crochet hook for the scarf
- 6mm crochet hook for the daisies and ripple stitch section
- Stitch markers
Scarf Base:
- Start with a slip knot.
- Chain 18.
- Yarn over, skip three chains, insert the hook into the fourth chain from the hook; make a double crochet.
- Continue making double crochets across until you reach the end of the row. You should have a total of 16 double crochets, counting the turning chain as one double crochet.
- Chain 3 (serves as your first double crochet), turn your work.
- Starting from the second stitch from the hook, make 16 double crochets across.
- To avoid missing stitches at the beginning or end of rows, you may place stitch markers in the first and last stitches of your row.
- Continue making rows of 16 double crochets each until you have 16 rows in total.
Joining the Ends:
- Fold the piece in half, with the right side facing you.
- Join the two ends by inserting the hook into the chain space on the opposite side, grabbing the loop and pulling through to make a single crochet.
- Continue to single crochet along the edge, joining the two sides together with 16 single crochets in total.

Ripple Stitch Section:
- Change to a 6mm hook to work the ripple stitch section loosely.
- Chain 3, turn the work.
- Make a double crochet increase in the first stitch (2 double crochets in the same stitch).
- Double crochet in the next stitch.
- Repeat the pattern of 2 double crochets in the next stitch, followed by 1 double crochet in the next stitch, across the row.
- You will end with 24 stitches across.
- Chain 2 (counts as half double crochet), turn.
- Skip the first stitch, and around the second stitch make a front post double crochet.
- For the next, make a back post double crochet.
- Continue making front post double crochet and back post double crochet across the row.
- When you reach the last stitch, make a half-double crochet into the third chain from the previous row.
- Repeat the front post and back post double crochet pattern for rows, measuring from the start of the ripple stitch section to your desired scarf length (approximately 60 centimeters or 24 inches was suggested).
- Finish the last row with a back post double crochet and then a half double crochet into the second chain.
Solomon’s Knot Edge:
- Chain 1, turn.
- Make a single crochet into the first stitch.
- Make a Solomon’s knot by pulling up a loop on your hook, holding the loop with your finger, yarn over, and drawing through a single crochet.
- Make 40 Solomon’s knots.
- After 40 knots, make a single crochet into the next stitch.
- Continue the pattern; 40 Solomon’s knots, followed by a single crochet in the next stitch, across the row.
Finishing:
- Once you reach the end of the row, you might add one more chain to secure the last knot.
- Cut your yarn, fasten off, and weave in all tails.
- If not yet applied, create or attach your crocheted daisy to the scarf according to the instructions provided in a separate video by the same creator.
Note:
- Always use markers for the beginning and end of your rows to avoid losing any stitches.
- Make sure to measure your work regularly to keep it within your desired dimensions.


Leave a Reply